
Mary Berry Rock Cakes Recipe [Tips & Tricks]
Note: This page contains affiliate links.
As an Amazon Associate, I earn from qualifying purchases when you click on the link, but you are not charged extra.
If you’re looking to bake something quick, easy, and absolutely delicious, you should definitely give Mary Berry’s rock cakes recipe a try!
These little treats are the perfect combination of crumbly, slightly sweet, and packed with fruit, making them a delightful snack for any time of the day. Plus, Mary Berry’s straightforward instructions ensure that even beginner bakers can whip up a batch with confidence. Whether you’re making them for a cozy afternoon tea or just because, these rock cakes are bound to become a favorite in your baking repertoire!
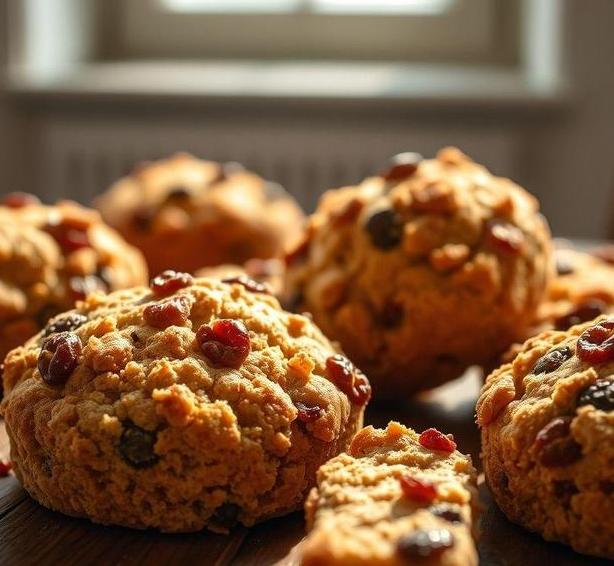
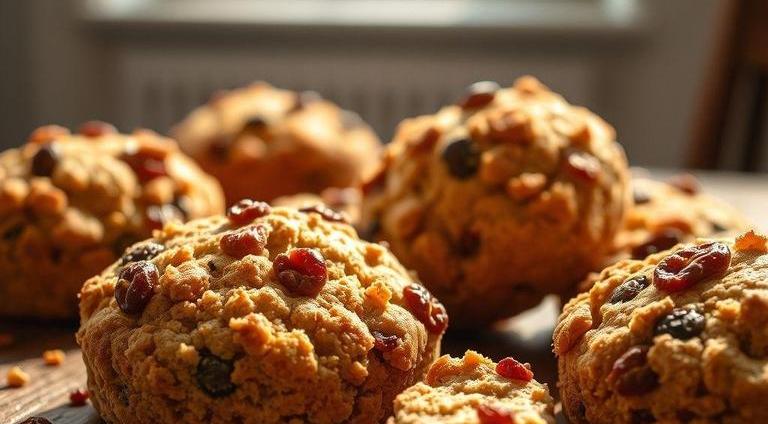
Mary Berry Rock Cakes Recipe
Ingredients Needed
To make Mary Berry’s iconic rock cakes, you’ll need a combination of simple yet essential baking ingredients that come together to create a deliciously crumbly and rustic treat. Here’s a detailed breakdown of what you’ll need:
-
Self-Raising Flour (225g): This flour is crucial for giving the rock cakes their lift and light texture. It contains baking powder, which ensures the cakes rise without the need for additional leavening agents.
-
Butter (100g): The butter helps create a rich, crumbly texture. Make sure it’s chilled and cut into small cubes for easier incorporation into the flour, which will prevent the dough from becoming too soft.
-
Caster Sugar (75g): For sweetness, caster sugar is ideal as it dissolves quickly and evenly into the mixture, giving a subtle sweetness to the cakes without being overpowering.
-
Mixed Dried Fruit (150g): This is a key ingredient in giving the rock cakes their character. Traditional recipes often call for currants, sultanas, or a combination of both, but you can use any dried fruit you like. Some variations even include glacé cherries for a burst of color and flavor.
-
Milk (2 tablespoons): The milk helps bring the dough together and adds a slight richness. The amount of milk may vary depending on how dry the mixture is, so adjust as needed to achieve a soft, but not sticky, dough.
-
Ground Mixed Spice (1/2 teaspoon): This warm and aromatic spice blend gives the rock cakes a comforting depth of flavor. If you don’t have mixed spice, you can substitute with a pinch of cinnamon or nutmeg, though it might slightly alter the flavor profile.
-
Egg (1): The egg binds the ingredients together, helping the mixture hold its shape and ensuring a cohesive texture in the final cakes. You’ll use this both in the dough and to brush the tops of the cakes before baking.
-
A Pinch of Salt: Salt brings out the sweetness of the other ingredients and enhances the overall flavor profile. It’s an essential addition in baking, even if it’s just a small amount.
Equipment Needed
Creating Mary Berry’s rock cakes requires a few basic pieces of kitchen equipment that ensure your baking process goes smoothly. Here’s what you’ll need:
-
Large Mixing Bowl: This is essential for combining all of the dry ingredients and then folding in the butter. The larger the bowl, the more comfortable it will be to mix without spilling.
-
Baking Tray or Sheet: A standard baking tray is perfect for arranging your rock cakes. It allows for even heat distribution while baking. Make sure to line it with parchment paper or lightly grease it to prevent sticking.
-
Pastry Cutter or Fingers: To incorporate the butter into the flour, a pastry cutter is the most efficient tool. Alternatively, you can use your fingertips to rub the butter into the flour, creating a breadcrumb-like texture.
-
Table Spoon: This will help scoop out the dough and shape the rough rock cake mounds on the baking tray. It’s important to keep the shapes irregular to achieve that classic "rocky" look.
-
Pastry Brush: A pastry brush is needed for brushing the egg wash over the tops of the cakes, giving them a beautiful golden brown finish once baked.
-
Cooling Rack: After baking, a cooling rack will help the rock cakes cool evenly, preventing them from becoming soggy on the bottom.
How To Make Mary Berry’s Rock Cakes
Making Mary Berry’s rock cakes is a simple process, but one that requires a little attention to detail to ensure the cakes turn out perfectly crumbly and delicious. Follow these steps for the best results:
-
Preheat the Oven: Begin by preheating your oven to 190°C (170°C fan) or 375°F. This ensures that the cakes are baked at the right temperature from the moment they enter the oven.
-
Prepare the Baking Tray: Line a baking tray with parchment paper or lightly grease it to ensure your rock cakes come off easily after baking.
-
Mix the Dry Ingredients: In a large mixing bowl, sift together the self-raising flour, mixed spice, and a pinch of salt. This helps to ensure that the dry ingredients are evenly distributed, and any lumps are removed.
-
Incorporate the Butter: Add the chilled, cubed butter to the flour mixture. Using a pastry cutter or your fingertips, rub the butter into the flour until it resembles breadcrumbs. Be gentle and quick, as you want to retain small pieces of butter for that crumbly texture.
-
Add the Sugar and Fruit: Stir in the caster sugar and dried fruit, making sure the fruit is evenly distributed throughout the mixture.
-
Bind with Egg and Milk: Beat the egg in a small bowl, and add it to the dry ingredients along with the milk. Mix gently with a spoon or your hands until the dough begins to come together. You want the dough to be firm but not too sticky. If it’s too dry, add a little more milk, a teaspoon at a time.
-
Shape the Cakes: Using a spoon, scoop the dough into rough mounds on the prepared baking tray. Don’t worry about making them perfect – the uneven shape is what gives the rock cakes their rustic charm. Space them out a little so they have room to expand while baking.
-
Egg Wash: Brush the tops of each rock cake with the beaten egg to give them a golden color as they bake.
-
Bake: Place the tray in the preheated oven and bake for 15-20 minutes, or until the cakes are golden brown and firm to the touch. Keep an eye on them, as ovens can vary.
-
Cool: Once baked, remove the rock cakes from the oven and allow them to cool on a wire rack. Enjoy them warm or at room temperature.
Expert Tips
-
Chilled Butter Is Key: For the best crumbly texture, ensure your butter is cold when you incorporate it into the flour. If the butter becomes too soft, it will make the dough too greasy, and the cakes won’t have the desired texture.
-
Don’t Overmix: When combining the ingredients, you want to mix just enough to bring the dough together. Overmixing can result in dense, heavy cakes.
-
Use the Right Dried Fruit: While currants and sultanas are the traditional options, feel free to experiment with other dried fruits like raisins, chopped dried apricots, or cranberries. Just remember to chop any large pieces into smaller bits for even distribution.
-
Rustic Is Best: The key to a good rock cake is its rough, irregular shape. The more uneven the mounds, the more authentic and "rocky" the cakes will look. Embrace the imperfections!
-
Watch Your Oven: Every oven is different, so keep an eye on your rock cakes. They should be golden and firm to the touch when they’re done. If they start to brown too quickly, you can lower the oven temperature slightly.
Mary Berry’s rock cakes are a delightful treat, perfect for a quick bake that’s both simple and satisfying. With their crumbly texture, sweet dried fruit, and subtle spicing, these cakes are the epitome of comfort baking.
Whether enjoyed with a cup of tea or packed into a lunchbox, rock cakes never fail to deliver both in flavor and nostalgia. By using the right ingredients, following the simple steps, and incorporating a few expert tips, you can easily recreate this British classic in your own kitchen. So, next time you’re in the mood for a tasty treat, give these rock cakes a try – they’re sure to become a family favorite!.
Easy Recipe Variations For Mary Berry’s Rock Cakes
Mary Berry’s rock cakes are a beloved treat known for their crumbly texture, golden exterior, and delightful balance of sweetness. While her classic recipe is already a crowd-pleaser, there are plenty of easy and delicious variations to experiment with. These adaptations allow you to cater to different tastes, dietary needs, or simply switch things up when you’re in the mood for something new.
-
Fruit Variations:
One of the simplest ways to change up the flavor profile of your rock cakes is by adjusting the fruit. Traditional rock cakes often feature currants, but you can swap these for a variety of dried fruits. Consider using sultanas, raisins, chopped dried apricots, or even dried cranberries for a more tangy, zesty flavor. If you prefer a fresher taste, try adding chopped fresh fruits like apples or pears. These will add a touch of moisture to the cakes, but be careful not to overdo it to prevent them from becoming too soggy. -
Nuts and Seeds:
For added texture and flavor, consider incorporating nuts or seeds into your rock cakes. Chopped almonds, hazelnuts, or walnuts will give the cakes a slightly nutty richness. You can even use sunflower or pumpkin seeds for a bit of crunch. The nuts can be folded into the dough or sprinkled on top before baking for extra visual appeal. -
Spices and Flavors:
While Mary Berry’s original recipe uses a touch of mixed spice, you can boost the flavor profile with other spices. Cinnamon, nutmeg, or even ginger can give your rock cakes a cozy, warm undertone. For a more exotic twist, try cardamom or allspice. For a more citrusy version, adding orange or lemon zest to the dough can brighten the flavor and provide a refreshing contrast to the sweetness of the dried fruit. -
Chocolate Lovers’ Delight:
If you’re a fan of chocolate, why not add a little cocoa powder to the dough?Mixing in some small chocolate chunks or chocolate chips is another simple way to take these rock cakes to the next level. Dark chocolate or milk chocolate works beautifully, and even a swirl of white chocolate can add a creamy sweetness to balance the richness of the cake.
-
Vegan or Dairy-Free Variations:
For those following a vegan or dairy-free diet, it’s easy to make Mary Berry’s rock cakes suitable for these needs. Simply substitute the butter with a plant-based alternative such as vegan margarine or coconut oil. To replace the egg, you can use a flaxseed egg (1 tablespoon of ground flaxseeds mixed with 3 tablespoons of water), which will bind the ingredients together while adding a nutty flavor. Additionally, you can use a non-dairy milk such as almond milk or oat milk in place of regular milk.
These simple changes allow you to create a variety of rock cakes that suit different preferences, whether you’re after something more decadent, healthier, or tailored to specific dietary restrictions.
Best Practices To Store Leftovers
If you’ve baked a batch of Mary Berry’s rock cakes and find yourself with leftovers, it’s important to store them properly to maintain their freshness and texture. Given their slightly crumbly and dry nature, rock cakes can be a bit tricky to store, but with the right methods, you can enjoy them for several days or even freeze them for later.
-
Room Temperature Storage:
After baking, let the rock cakes cool completely. Once they are cool, place them in an airtight container or a resealable bag at room temperature. They should stay fresh for up to 2-3 days. Be sure to store them in a dry place away from heat and humidity, as exposure to moisture can cause them to become soggy or lose their crunch. -
Using Parchment Paper:
If you’re stacking the cakes in the container, consider using parchment paper between layers to prevent them from sticking together or getting crushed. This will also help preserve their shape and texture. -
Freezing Rock Cakes:
If you’ve made a large batch or want to keep them for a longer period, freezing is a great option. After they’ve cooled completely, place the rock cakes in a single layer on a baking sheet and freeze them for about 1-2 hours. Once frozen, transfer them into a resealable freezer bag or airtight container, where they will keep for up to 3 months. To defrost, simply leave them out at room temperature for an hour or so, or you can reheat them in the oven at a low temperature for a few minutes to restore some of their original texture. -
Avoid Refrigeration:
While it might seem like a good idea to store them in the fridge, refrigeration can cause rock cakes to become stale and dry more quickly. The cool, damp environment of the fridge can affect their crispness, so it’s better to store them at room temperature or freeze them if you won’t be consuming them soon.
By following these best practices, your leftover rock cakes will remain as fresh and delicious as possible, whether you’re indulging in them the next day or months later.
What Goes Well With Rock Cakes
Rock cakes are wonderful on their own, but they also pair beautifully with a variety of accompaniments that can elevate the eating experience. Whether you’re serving them for afternoon tea or enjoying them as a snack, here are a few ideas for what to serve alongside Mary Berry’s rock cakes.
-
Tea:
The classic pairing for rock cakes is, of course, a hot cup of tea. The slight crumbliness and sweetness of the cakes balance out the tannins in the tea, especially when it’s a nice, strong black tea like English Breakfast or Earl Grey. For a more delicate experience, you might want to try a white or green tea. The lighter flavors of these teas can enhance the fruity or spiced notes in your rock cakes. -
Clotted Cream and Jam:
If you want to turn your rock cakes into a more indulgent treat, serve them with a dollop of clotted cream and a spoonful of your favorite jam or preserves. Strawberry, raspberry, or apricot jam work especially well, as their fruity sweetness complements the richness of the cream and the slight crumbliness of the rock cakes. -
Cheese:
For something a little more savory, rock cakes can pair surprisingly well with cheese. A mild, creamy cheese such as Brie or Camembert can offer a nice contrast to the sweetness of the cakes. Alternatively, a tangy goat’s cheese or even a sharp cheddar might provide a more robust contrast that complements the texture of the rock cakes. -
Fresh Fruit:
If you prefer a lighter pairing, fresh fruit is an excellent choice. Sliced apples, pears, or berries provide a refreshing contrast to the dense, crumbly texture of the rock cakes. The natural sweetness and juiciness of the fruit can balance out the richness of the cakes, making for a refreshing snack. -
Yogurt or Custard:
For a comforting, creamy pairing, try serving your rock cakes with a side of thick, velvety yogurt or warm custard. The creamy texture complements the dry crumb of the cakes, turning them into a more indulgent dessert.
Conclusion
Mary Berry’s rock cakes, with their simple yet satisfying texture and flavor, are a timeless treat that can be easily adapted to suit various tastes and occasions. Whether you’re sticking to the classic recipe or adding your own spin with dried fruits, nuts, or spices, these little cakes offer endless possibilities for creativity.
By storing them properly and pairing them with complementary foods like tea, cream, or cheese, you can enjoy them at their best, whether fresh out of the oven or as leftovers. In the end, rock cakes are a delightful, versatile treat that can be enjoyed in many different ways, making them a staple in every home baker’s repertoire.
FAQs
What Ingredients Do I Need For Mary Berry’s Rock Cakes?
To make Mary Berry’s rock cakes, you will need self-raising flour, baking powder, margarine or butter, sugar, mixed dried fruit (like currants or raisins), an egg, and a pinch of salt. You may also want to add a little milk to adjust the dough consistency.
How Long Do I Need To Bake Mary Berry’s Rock Cakes?
Mary Berry’s rock cakes typically need to be baked in a preheated oven at 180°C (160°C for fan ovens) for about 15-20 minutes, or until they are golden brown. However, baking times can vary based on the size of the cakes, so it’s a good idea to check for doneness by gently tapping the top for a firm sound.
Why Are They Called ‘rock Cakes’?
Rock cakes are named for their rustic appearance and rough texture, which resembles small rocks. They are not soft and spongy like other cakes but are more scone-like with a crumbly, dense interior and a slightly crisp exterior.
Can I Substitute Butter For Margarine In Mary Berry’s Rock Cakes Recipe?
Yes, you can substitute butter for margarine in Mary Berry’s rock cakes. However, keep in mind that butter will give the cakes a richer flavor and a slightly different texture compared to margarine. You can use equal amounts of butter as the margarine in the recipe.
Do I Need To Sift The Flour For Mary Berry’s Rock Cakes?
It is recommended to sift the flour when making rock cakes to ensure there are no lumps and to help incorporate air into the mixture. This will result in a lighter texture in the final cake, though it’s not strictly essential.
Can I Add Other Fruits To Mary Berry’s Rock Cakes Recipe?
Yes, you can customize the dried fruit in Mary Berry’s rock cakes by using other fruits like sultanas, dried cranberries, or chopped dried apricots. Just ensure the total amount of fruit remains the same as the recipe suggests to maintain the correct balance of wet and dry ingredients.
How Can I Tell When Mary Berry’s Rock Cakes Are Done Baking?
Mary Berry’s rock cakes are done when they have turned a golden-brown color on the outside and are firm to the touch. You can also insert a skewer into the center to check if it comes out clean, which indicates the cakes are cooked through.
Can I Freeze Mary Berry’s Rock Cakes?
Yes, you can freeze Mary Berry’s rock cakes. Allow them to cool completely after baking, then store them in an airtight container or wrap them individually in cling film before freezing.
They can be kept for up to three months. To enjoy them, simply defrost at room temperature or warm them gently in the oven.
Can I Make Mary Berry’s Rock Cakes Ahead Of Time?
Yes, Mary Berry’s rock cakes can be made ahead of time. Once baked and cooled, store them in an airtight container for up to three days. If you want them to last longer, freezing them is a good option as mentioned above.
How Can I Make Mary Berry’s Rock Cakes More Flavorful?
To enhance the flavor of Mary Berry’s rock cakes, you can experiment with adding a teaspoon of ground cinnamon, nutmeg, or mixed spice to the dry ingredients. You can also use orange zest or a splash of vanilla extract to give them a subtle but delicious aroma.
![Mary Berry Banana Fruit Bread Recipe [Tips & Tricks]](https://famousyummyrecipes.com/wp-content/uploads/2025/03/banana-fruit-bread.jpg)
![Mary Berry Gravadlax With Mustard And Dill Sauce Recipe [Tips & Tricks]](https://famousyummyrecipes.com/wp-content/uploads/2025/03/gravadlax-with-mustard-and-dill-sauce.jpg)
![Mary Berry Waldorf Salad Recipe [Tips & Tricks]](https://famousyummyrecipes.com/wp-content/uploads/2025/03/waldorf-salad.jpg)
![Mary Berry Smoked Mackerel Pate Recipe [Tips & Tricks]](https://famousyummyrecipes.com/wp-content/uploads/2025/03/smoked-mackerel-pate.jpg)
![Mary Berry Chicken Satay Style Curry Recipe [Tips & Tricks]](https://famousyummyrecipes.com/wp-content/uploads/2025/03/chicken-satay-style-curry.jpg)
![Mary Berry Tiger Prawn Courgetti Recipe [Tips & Tricks]](https://famousyummyrecipes.com/wp-content/uploads/2025/03/tiger-prawn-courgetti.jpg)