
Mary Berry Mini Jam Tarts Recipe [Tips & Tricks]
Note: This page contains affiliate links.
As an Amazon Associate, I earn from qualifying purchases when you click on the link, but you are not charged extra.
If you’re a fan of simple yet delicious treats, Mary Berry’s mini jam tarts are an absolute must-try!
With her signature style of creating foolproof, crowd-pleasing recipes, these little tarts are the perfect blend of buttery, melt-in-your-mouth pastry and sweet, fruity jam. Whether you’re baking for a special occasion or just looking for a cozy afternoon snack, these tarts are super easy to make and are guaranteed to impress your friends and family. Plus, they’re so customizable with your favorite jam flavor, making them a fun and versatile choice for any occasion!
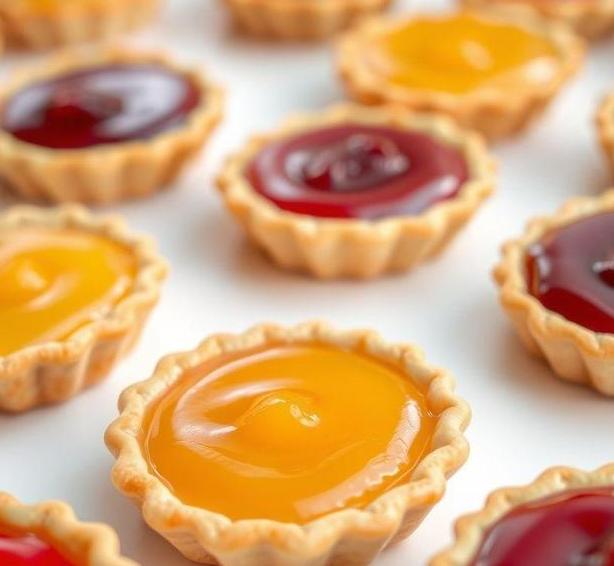
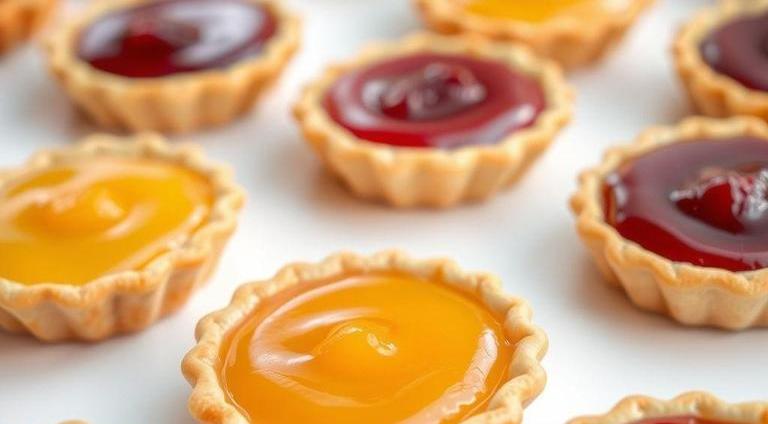
Mary Berry Mini Jam Tarts Recipe
Ingredients Needed
Making Mary Berry’s Mini Jam Tarts is a delightful process, especially if you have a sweet tooth and enjoy creating baked goods that are both delicious and easy to assemble. Here’s a breakdown of the key ingredients that you’ll need for this recipe:
-
Shortcrust Pastry
The base of any tart, the shortcrust pastry is buttery and crisp, which serves as the perfect foundation for the sweet jam. You can either use store-bought shortcrust pastry for convenience or prepare your own from scratch using flour, butter, sugar, and a pinch of salt. The homemade version offers a richer, flakier texture, which many prefer.
-
Jam
Jam is the star of the mini tarts, and the beauty of this recipe lies in its versatility. You can use your favorite jam or preserve, ranging from classic strawberry, raspberry, and apricot to more adventurous options like blackcurrant or even lemon curd.
The jam should be thick enough to hold its shape when baked but not too runny, as this could cause a soggy base. Mary Berry recommends a smooth jam for the best results, but you can always opt for one with chunks of fruit if you prefer a more textured filling.
-
Caster Sugar
For a slightly sweet touch to the pastry, caster sugar is a go-to ingredient. It’s finer than regular granulated sugar, which makes it dissolve quickly and evenly in the pastry dough, giving it that melt-in-your-mouth quality.
-
Butter
Unsalted butter is preferred in this recipe, as it allows you to control the salt content and enhances the richness of the pastry. The butter should be chilled when making the dough, ensuring a flaky texture once baked.
-
Egg Yolk (Optional)
Some recipes for shortcrust pastry call for an egg yolk, and while this is optional, it does add a lovely richness and color to the pastry, which can help it achieve that golden-brown perfection once baked.
-
Flour
Plain (all-purpose) flour is typically used for shortcrust pastry. This gives the dough structure without making it too dense. You don’t need a fancy flour; just ensure it’s plain and free from self-raising agents.
Equipment Needed
While the ingredients list is straightforward, the right equipment can make a big difference in ensuring that your mini jam tarts come out perfectly. Here’s what you’ll need:
-
Baking Tray
A baking tray or baking sheet is necessary to arrange your mini tart cases on for baking. A flat surface ensures even heat distribution, which is key for a crisp base and beautifully golden edges.
-
Mini Tart or Muffin Tin
To form the shape of the mini tarts, you’ll need a mini tart tin, also known as a tartlet or muffin tin. These small, individual-sized pans ensure that each tart holds its shape and cooks evenly. Non-stick versions of these tins are especially useful for easy removal after baking.
-
Rolling Pin
A rolling pin is essential for flattening out your pastry dough to the correct thickness. You want your pastry to be rolled thin enough to form delicate, crisp tart shells, but not so thin that they break during handling.
-
Pastry Cutter or Round Cookie Cutter
To cut out the pastry to fit the tart tin, a pastry cutter or round cookie cutter in the right size is important. It should match the size of your tin to create the perfect base for each tart shell. If you don’t have a pastry cutter, any round object of the right size, such as a drinking glass, will work.
-
Baking Paper and Baking Beans (Optional)
If you want to blind bake the pastry (which is often recommended for a crisp tart base), you’ll need some baking paper and baking beans or rice. The paper helps to weigh down the pastry, preventing it from puffing up during baking.
-
Pastry Brush
If you’re opting to brush the pastry with egg wash for a golden finish, a pastry brush is a helpful tool to have on hand. The gentle bristles ensure that you coat the pastry evenly without overapplying.
-
Cooling Rack
After baking, the mini tarts need to cool before serving. A cooling rack ensures that air circulates around the tarts, preventing them from becoming soggy on the bottom.
How To Make Mary Berry’s Mini Jam Tarts
Making these mini jam tarts is a fun and relatively simple process that yields a batch of irresistible treats. Follow these detailed steps, and you’ll soon have a tray of golden, jam-filled perfection:
-
Prepare the Pastry
Start by making the shortcrust pastry. If you’re using store-bought pastry, just roll it out on a lightly floured surface to the desired thickness, typically about 3mm.
For homemade pastry, combine the flour, sugar, and butter in a food processor, and pulse until the mixture resembles breadcrumbs. Add a splash of cold water to bring the dough together. Wrap it in plastic wrap and chill for about 30 minutes before using.
-
Preheat the Oven
Preheat your oven to 180°C (160°C fan) or 350°F. This ensures that your mini jam tarts bake evenly.
-
Roll Out the Dough
Once the pastry is chilled and workable, roll it out evenly. Using a round cutter, cut out circles of pastry large enough to fit into your mini tart tin.
-
Line the Tart Tins
Carefully line the tart tins with the pastry circles, pressing gently into the edges to ensure they fit snugly. Don’t worry if the edges are a bit uneven-that rustic look adds charm to your tarts!
-
Fill with Jam
Spoon a small dollop of your chosen jam into the center of each pastry case. Be careful not to overfill, as the jam can bubble over during baking. A teaspoon of jam per tart should suffice.
-
Bake the Tarts
Place the tart tray in the preheated oven and bake for about 15-20 minutes or until the pastry is golden and crisp, and the jam is bubbling. Keep an eye on them towards the end of baking to ensure they don’t burn.
-
Cool and Serve
Allow the tarts to cool in the tin for a few minutes before transferring them to a cooling rack. Serve warm, or once fully cooled, dust with a little powdered sugar if you’d like to add an extra touch of elegance.
Expert Tips
-
Chill the Dough
One of the most important tips for achieving the perfect shortcrust pastry is to chill the dough before rolling it out. This helps prevent the butter from melting too quickly, which would result in a greasy, dense texture. Chilled dough also prevents shrinkage during baking.
-
Use Room Temperature Jam
Using room temperature jam instead of cold jam ensures a smoother filling that’s easier to spoon into the tart cases without it being too thick or difficult to spread.
-
Blind Bake the Pastry
If you prefer an even crisper tart shell, blind bake the pastry for 10-12 minutes before adding the jam. To do this, line the pastry with baking paper, fill it with baking beans, and bake it for the first 10 minutes. Then remove the beans and continue baking for another 5 minutes before adding your jam filling.
-
Experiment with Flavors
While the classic strawberry or raspberry jam is always a hit, don’t be afraid to experiment with different fruit preserves or even a swirl of lemon curd. You can also mix and match different jams within each tart for a colorful and flavorful variety.
-
Work Quickly
When handling pastry, work quickly and avoid overworking it. Overworking the dough can result in a tough, dense pastry, so aim to handle it gently and just enough to shape it.
Mary Berry’s Mini Jam Tarts are a classic British treat that offers a delicious combination of buttery, flaky pastry and sweet, tangy jam. These little tarts are perfect for any occasion, whether it’s a casual afternoon tea, a family gathering, or a celebratory dessert.
The recipe is flexible, easy to adapt to personal taste, and offers a great way to use up any leftover jam you have in the pantry. With the right ingredients, tools, and a few simple steps, you can create these irresistible mini treats that will bring joy to anyone who tastes them.
Easy Recipe Variations For Mary Berry’s Mini Jam Tarts
Mary Berry’s Mini Jam Tarts are an iconic British treat, loved for their buttery, melt-in-your-mouth shortcrust pastry and sweet, fruit-filled center. While her traditional recipe is simply delightful, there are plenty of creative ways to add a unique twist and personalize these little tarts to suit your taste or occasion. Here are some easy and delicious variations to consider:
1. Flavored Pastry
If you’re looking to elevate the flavor of the pastry, try adding a dash of spice or citrus zest to the dough.
- Cinnamon Pastry: A sprinkle of ground cinnamon into the flour mixture will add a warm, aromatic note that pairs wonderfully with berry jams.
- Orange Zest: Incorporating orange or lemon zest into the pastry will add a citrusy zing that complements many fruit jams, especially those made with berries, apricots, or cherries.
- Almond Pastry: For a nutty twist, replace some of the butter with ground almonds or almond extract in the dough. This variation brings a fragrant depth to the tarts that is deliciously unexpected.
2. Jam Varieties
While strawberry and raspberry jams are the classics, don’t be afraid to experiment with different jams and preserves for new flavor profiles.
- Apricot Jam: Apricot’s light, floral sweetness works beautifully with the buttery shortcrust pastry.
- Blackberry Jam: Its tangy notes offer a lovely contrast to the richness of the pastry, making it a favorite in autumn.
- Mixed Fruit Jam: Combine a variety of jams-strawberry, raspberry, and blackberry-for a vibrant, multi-layered flavor experience.
- Lemon Curd: Swap out the jam entirely and fill the tarts with zesty lemon curd. The tartness balances out the sweetness of the pastry, giving you a refreshing alternative.
3. Add-Ins And Toppings
For an even more indulgent treat, try adding creative toppings or mix-ins to the jam before filling the tart shell.
- Fresh Berries: Top your jam with fresh raspberries, blackberries, or blueberries for extra texture and burst of flavor.
- Crumbled Biscuits or Oats: Before spooning the jam into the tart shells, sprinkle a little crushed digestive biscuits or rolled oats into the base. This adds an extra crunch that contrasts nicely with the smooth jam.
- Nuts: Chopped pistachios, slivered almonds, or even hazelnuts can be sprinkled on top of the jam filling before baking. The nuts provide a delightful crunch and richness.
- Whipped Cream or Custard: Serve the tarts with a dollop of whipped cream or a drizzle of thick custard for an indulgent dessert experience.
4. Mini Tarts With A Savory Twist
For a completely different take, you can switch up the sweet filling for a savory jam or preserve. Think of chutneys, such as mango or tomato and onion chutney, paired with a savory cheese like brie or goat cheese in the tart base. The balance of sweet and savory flavors is delightful, and it’s a perfect option for parties or a light appetizer.
Best Practices To Store Leftovers
Mary Berry’s Mini Jam Tarts are so delicious that they rarely last long, but if you happen to have leftovers, proper storage is key to maintaining their freshness and flavor.
1. Cooling Before Storing
Make sure the tarts are fully cooled before storing them. This prevents condensation from forming inside the storage container, which could make the pastry soggy. Place the tarts on a wire rack and allow them to cool completely.
2. Room Temperature Storage
If you plan to eat the tarts within a day or two, storing them at room temperature is perfectly fine. Use an airtight container to keep them fresh.
Make sure to separate the tarts with parchment paper if they are stacked, as this prevents them from sticking to each other. Store them in a cool, dry place away from direct sunlight.
3. Refrigeration For Longer Shelf Life
For slightly longer storage, you can refrigerate your mini jam tarts. Although the cold can make the pastry less crisp, it helps preserve the jam filling.
Store the tarts in an airtight container or wrap them in plastic wrap before placing them in the fridge. They should keep for up to 4 days this way.
4. Freezing For Future Enjoyment
If you have more tarts than you can handle, freezing is a great option. To freeze mini jam tarts, place them on a baking sheet in a single layer and freeze until solid (this prevents them from sticking together).
Once frozen, transfer them to a freezer-safe container or bag. For best results, consume them within 2-3 months. When ready to eat, thaw at room temperature or reheat in the oven at a low temperature to restore some of the crispiness.
5. Reheating Leftovers
To bring back some of the original texture, it’s best to reheat the tarts in the oven, not the microwave. Preheat the oven to about 170°C (340°F) and place the tarts on a baking sheet.
Heat for 5-10 minutes or until the pastry is crisp again. If you’re in a rush, a microwave will work, but the texture of the pastry won’t be the same.
What Goes Well With Mini Jam Tarts
Mini Jam Tarts are an absolute treat on their own, but pairing them with complementary foods or drinks can enhance the experience. Here are some suggestions to elevate your tart experience:
1. Beverages To Pair With Mini Jam Tarts
- Tea: A classic choice. Black teas like Earl Grey or English Breakfast complement the sweetness of the jam perfectly. For a lighter option, try a delicate green tea or a fruity herbal tea like chamomile or rooibos.
- Coffee: A rich, slightly bitter coffee balances out the sweetness of the tarts, making it an ideal pairing for those who enjoy a bit of contrast.
- Sparkling Wine or Champagne: For something more celebratory, a glass of dry sparkling wine or champagne offers a nice contrast to the sweetness of the jam and the richness of the pastry.
- Milk or Hot Chocolate: For a comforting treat, especially in colder weather, milk or a rich hot chocolate can be the perfect pairing. The smooth, creamy texture of the milk complements the buttery pastry wonderfully.
2. Fruit And Nut Companions
Mini Jam Tarts often benefit from a fresh element that provides a balance to the rich sweetness.
- Fresh Berries: Serve alongside some fresh strawberries, raspberries, or blackberries to enhance the fruity aspect of the jam inside the tart.
- Nuts: A small bowl of salted almonds or pistachios can provide a nice contrast to the sweetness, giving your guests a salty snack to enjoy with their tarts.
3. Ice Cream And Cream
For a more indulgent dessert experience, serve your mini jam tarts with a scoop of vanilla ice cream, clotted cream, or whipped cream. The cold and creamy textures provide a delightful contrast to the warm pastry and jam, making for a decadent treat.
4. Cheese
While it may seem unusual, pairing mini jam tarts with a mild, soft cheese like brie or mascarpone can create an interesting sweet and savory balance. The richness of the cheese complements the sweetness of the jam and offers a more complex flavor profile.
Conclusion
Mary Berry’s Mini Jam Tarts are a charming, versatile treat that offers endless opportunities for variation and customization. Whether you stick to the classic recipe or experiment with different flavors and fillings, these tarts always deliver a delightful balance of buttery pastry and sweet jam.
Storing them properly ensures you can savor them for days, and when paired with the right beverages or sides, they can become a part of any occasion, from casual tea parties to special celebrations. Simple yet sophisticated, these mini tarts are sure to remain a favorite for years to come, offering a taste of nostalgia and the joy of homemade baking with every bite.
FAQs
What Ingredients Do I Need For Mary Berry’s Mini Jam Tarts?
To make Mary Berry’s mini jam tarts, you’ll need the following ingredients: shortcrust pastry, butter, sugar, egg, plain flour, and your choice of jam (such as raspberry, strawberry, or apricot). These ingredients create a crisp and buttery base with a sweet jam filling.
How Long Does It Take To Make Mary Berry’s Mini Jam Tarts?
The preparation time for Mary Berry’s mini jam tarts is about 20 minutes, and the cooking time is around 15-20 minutes. So, overall, you’ll have a batch of freshly baked mini jam tarts in approximately 40 minutes.
Can I Use Store-bought Pastry For Mary Berry’s Mini Jam Tarts?
Yes, you can use store-bought shortcrust pastry if you’re looking for a quicker option. It will save time and still deliver great results, though making your own pastry from scratch adds a homemade touch and extra flavor.
What Type Of Jam Works Best For Mary Berry’s Mini Jam Tarts?
Mary Berry’s mini jam tarts work well with almost any fruit jam. Popular choices include raspberry, strawberry, apricot, or blackcurrant. The jam should be thick, so it doesn’t run too much while baking.
Can I Make Mary Berry’s Mini Jam Tarts Ahead Of Time?
Yes, you can prepare the mini jam tarts ahead of time. You can make the pastry and fill the tarts with jam, then store them in the fridge before baking. Alternatively, you can bake them in advance and store them in an airtight container for a few days.
How Do I Prevent The Pastry From Shrinking When Baking Mary Berry’s Mini Jam Tarts?
To prevent shrinking, make sure to chill the pastry before baking. You can also blind bake the tart shells (pre-bake the pastry without filling) for a few minutes with baking beans before adding the jam to help keep the shape intact.
Can I Use A Different Type Of Jam Or Filling For Mary Berry’s Mini Jam Tarts?
Yes, you can customize the tarts by using other fillings such as lemon curd, chocolate spread, or a mix of fresh fruit and custard. However, for the best results, ensure the filling is thick enough to not spill over while baking.
What Should The Texture Of Mary Berry’s Mini Jam Tarts Be Like?
The pastry should be golden and crisp, while the jam filling should be slightly set but still soft and sticky. The combination of a buttery, crunchy base and a sweet, flavorful jam creates the ideal texture.
Can I Freeze Mary Berry’s Mini Jam Tarts?
Yes, you can freeze both the unbaked and baked mini jam tarts. If freezing unbaked, place them on a tray to freeze individually, then transfer to a freezer bag. To bake from frozen, simply add a few extra minutes to the baking time.
How Do I Know When Mary Berry’s Mini Jam Tarts Are Fully Baked?
Mary Berry’s mini jam tarts are ready when the pastry is golden brown and the jam is bubbling slightly at the center. Keep an eye on them towards the end of the baking time to prevent overbaking or burning the jam.
![Mary Berry Warming Chicken Noodle Soup Recipe [Tips & Tricks]](https://famousyummyrecipes.com/wp-content/uploads/2025/03/warming-chicken-noodle-soup.jpg)
![Mary Berry Chocolate Fudge Icing Recipe [Tips & Tricks]](https://famousyummyrecipes.com/wp-content/uploads/2025/03/chocolate-fudge-icing.jpg)
![Mary Berry Almond Mince Pies Recipe [Tips & Tricks]](https://famousyummyrecipes.com/wp-content/uploads/2025/03/almond-mince-pies.jpg)
![Mary Berry Colcannon Mash Recipe [Tips & Tricks]](https://famousyummyrecipes.com/wp-content/uploads/2025/03/colcannon-mash.jpg)
![Mary Berry Honey Roasted Carrots And Parsnips Recipe [Tips & Tricks]](https://famousyummyrecipes.com/wp-content/uploads/2025/03/honey-roasted-carrots-and-parsnips.jpg)
![Mary Berry Rum Truffles Recipe [Tips & Tricks]](https://famousyummyrecipes.com/wp-content/uploads/2025/03/rum-truffles.jpg)