
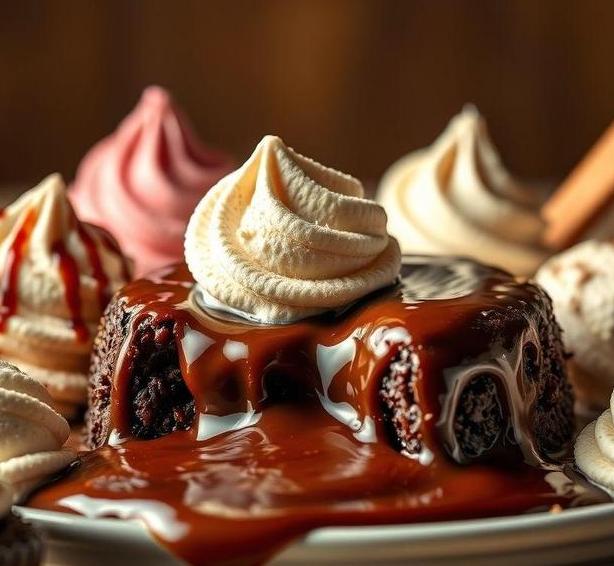
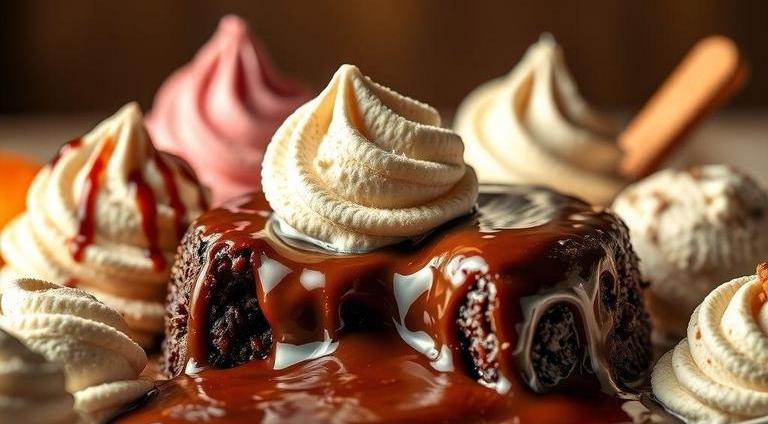
Mary Berry Melting Moments Recipe [Tips & Tricks]
Note: This page contains affiliate links.
As an Amazon Associate, I earn from qualifying purchases when you click on the link, but you are not charged extra.
If you’re looking for a simple yet irresistible treat to brighten your day, Mary Berry’s Melting Moments recipe is an absolute must-try!
These buttery, melt-in-your-mouth biscuits are the perfect combination of light texture and sweet flavor, making them ideal for any occasion.
With Mary Berry’s tried-and-tested recipe, you’ll find yourself creating a batch of these delicate cookies in no time, and the best part?
They’re so easy to make, even beginners can master them!
Whether you’re enjoying them with a cup of tea or sharing them with friends, these Melting Moments are sure to become a favorite in your baking repertoire.
Mary Berry Melting Moments Recipe
Ingredients Needed
Mary Berry’s Melting Moments are a delightfully delicate biscuit that practically melt in your mouth, combining buttery richness with a hint of sweetness. To create these perfect biscuits, you’ll need a variety of simple yet effective ingredients:
-
Butter
The key to achieving a soft, melt-in-your-mouth texture is using unsalted butter. It’s best to use butter that’s at room temperature, so it blends smoothly with the other ingredients. This contributes to the rich, melt-in-the-mouth quality of the biscuits.
-
Icing Sugar
Icing sugar (or powdered sugar) is preferred here because it dissolves easily, giving the biscuits a smooth texture without any graininess. It helps the dough come together smoothly and makes for a fine, light crumb when baked.
-
Plain Flour
The backbone of any biscuit recipe is the flour. In this case, plain flour (also known as all-purpose flour) provides structure and balance. It’s essential for the biscuits to hold their shape while maintaining a tender, crumbly texture.
-
Cornflour
Cornflour (or cornstarch) is an essential ingredient that helps to make these biscuits extra delicate. It reduces the gluten content, creating a finer, softer texture that’s crucial to the melting moment experience.
-
Vanilla Extract
A dash of vanilla extract is added to infuse a subtle, aromatic sweetness. It enhances the overall flavor without overpowering the richness of the butter.
-
Golden Syrup
Some variations of Melting Moments call for golden syrup, which adds both sweetness and a slightly caramelized undertone to the biscuits. This gives them a deeper flavor and a beautifully glossy finish when used as a binding agent in the dough.
-
Filling (Optional)
To elevate the taste, these biscuits are often filled with either buttercream or jam, depending on the preferred version. Buttercream made from icing sugar, butter, and a hint of vanilla is a classic choice. Alternatively, a fruity jam like raspberry or strawberry adds a fresh, tart contrast to the sweetness of the biscuits.
Equipment Needed
Creating Mary Berry’s Melting Moments requires just a few simple tools that you likely already have in your kitchen, but each one plays an important role in making these biscuits perfect:
-
Mixing Bowls
You’ll need at least two medium mixing bowls. One is for creaming the butter and sugar, and the other is for mixing the dry ingredients like flour and cornflour. Using two bowls helps to keep the process organized and ensures that all ingredients are thoroughly combined.
-
Electric Mixer or Hand Whisk
While you can mix by hand, an electric mixer makes the process smoother and quicker, especially when creaming butter and sugar. It helps achieve a light, airy texture, which is essential for the soft crumb of the biscuits.
-
Sifter
A sifter is used to ensure that your dry ingredients, particularly the flour and cornflour, are evenly aerated. This step helps eliminate lumps and makes for a smoother dough, resulting in lighter, more delicate biscuits.
-
Baking Tray
A flat, sturdy baking tray is needed to spread your biscuits out in a single layer. Make sure to line it with parchment paper to prevent sticking and ensure an even bake.
-
Piping Bag or Spoon
A piping bag fitted with a star-shaped nozzle is the traditional tool used for shaping the Melting Moments. It gives them that elegant, ridged appearance. If you don’t have one, you can always use a spoon to drop spoonfuls of dough onto the baking tray.
-
Cooling Rack
After baking, the biscuits need to cool down and firm up on a cooling rack. This helps prevent them from becoming soggy as they release steam and cool evenly.
How To Make Mary Berry’s Melting Moments
The process of making Mary Berry’s Melting Moments is simple, but attention to detail ensures that they turn out perfectly. Here’s a step-by-step guide:
-
Preheat the Oven
Start by preheating your oven to around 180°C (350°F). This ensures that the biscuits bake evenly from the moment they go in, creating a golden-brown finish without burning.
-
Prepare the Dough
In one bowl, sift together your plain flour and cornflour. Set this aside. In another bowl, cream together the butter and icing sugar using an electric mixer until the mixture is light and fluffy.
This can take a few minutes, so be patient!
Once the butter and sugar are well combined, add in the sifted flour mixture and a small amount of vanilla extract. Mix until the dough just comes together – it should be soft but not sticky.
-
Shape the Biscuits
Transfer the dough into a piping bag fitted with a star nozzle. Pipe the dough onto a baking tray lined with parchment paper, creating small rounds or rosettes. Leave space between each one, as they will slightly spread while baking.
-
Bake
Place the tray into the preheated oven and bake for about 12-15 minutes, or until the biscuits are just starting to turn golden at the edges. Be careful not to overbake them – they should remain pale in color and delicate.
-
Cool and Fill
Once baked, remove the biscuits from the oven and allow them to cool on a wire rack. When fully cooled, they’re ready to be filled. You can either sandwich two biscuits together with a layer of buttercream or jam, or leave them plain for a lighter option.
Expert Tips
-
Room Temperature Butter: Ensuring the butter is at room temperature before starting is key to achieving a smooth dough. Cold butter can cause the dough to be lumpy, while melted butter will result in a greasy dough that doesn’t hold its shape when baked.
-
Don’t Overwork the Dough: When mixing the dry ingredients with the wet ones, be careful not to overwork the dough. Overmixing can result in tougher biscuits, which is the opposite of what you’re aiming for. The dough should be just combined.
-
Chill the Dough: If your dough feels too soft or difficult to handle, place it in the fridge for about 15-30 minutes before shaping. This helps firm it up and makes it easier to pipe.
-
Baking Time: Because these biscuits are so delicate, keep a close eye on them while baking. They should be golden around the edges but not browned. If they are too golden or crisp, they will lose that signature melt-in-the-mouth texture.
-
Add Lemon Zest: If you want a slightly citrusy twist, try adding a little lemon zest to the dough. This will bring a refreshing lightness that pairs well with the sweetness of the biscuits.
Mary Berry’s Melting Moments are a true treat for the senses – light, buttery, and tender, with a flavor that’s both delicate and rich. Whether you fill them with creamy buttercream or a tangy fruit jam, they are sure to impress anyone with their soft, crumbly texture that genuinely melts in your mouth.
The ingredients are simple, and the equipment is basic, but with a little patience and attention to detail, these biscuits come together to create a delightful baking experience. Perfect for any occasion, they’ll make a beautiful addition to your baking repertoire.
With expert tips like ensuring room-temperature butter, gentle mixing, and perfect timing, you’re guaranteed to achieve success. So, give it a try – and enjoy a taste of Mary Berry’s baking magic!.
Easy Recipe Variations For Mary Berry’s Melting Moments
Mary Berry’s Melting Moments are a beloved treat for their delicate texture and rich buttery flavor. While the original recipe itself is divine, there are plenty of exciting variations to customize this classic and make it even more irresistible. Here are some fun twists that can elevate your Melting Moments:
-
Citrus Infusion: For a zesty, refreshing twist, you can add lemon or orange zest to the dough. Just a tablespoon or so of zest will infuse the biscuits with a burst of citrus flavor, giving them a light and vibrant profile. You could even substitute part of the vanilla extract with a few drops of orange or lemon extract for a stronger citrus punch.
-
Chocolate Chip Melting Moments: For the chocolate lovers out there, fold some mini chocolate chips into the dough. The melty chocolate adds a rich, sweet contrast to the buttery cookies. You can also dip the finished biscuits in melted chocolate for an extra indulgent treat.
-
Nutty Variations: If you’re a fan of nuts, you can incorporate ground almonds, hazelnuts, or even crushed pistachios into the dough. The nuts will not only enhance the flavor but also add texture. Alternatively, sprinkle finely chopped nuts on top of the cookies before baking to give them an elegant crunch and an inviting visual appeal.
-
Cinnamon Spice: A pinch of ground cinnamon can add a cozy, warm note to the biscuits. It pairs perfectly with the buttery flavor and brings a sense of comfort to the cookies. You can even experiment with adding a touch of nutmeg or cardamom for an exotic twist that will surprise your taste buds.
-
Berries and Cream: For a summery variation, add freeze-dried berries like raspberries or strawberries into the dough or sprinkle them over the cookies before baking. Pair the melting moments with a dollop of whipped cream or a berry jam in the filling to create a delightful combination of flavors that evoke a fresh fruit tart.
-
Salted Caramel: Swap out the traditional vanilla filling for a rich salted caramel filling. The sweet and salty contrast adds an element of sophistication, and the deep, warm flavor of caramel complements the crumbly texture of the cookies beautifully. You could drizzle some caramel over the top for an extra touch of luxury.
These variations can easily be made by adjusting just a few ingredients, keeping the spirit of the classic Melting Moments intact while offering something new for your taste buds.
Best Practices To Store Leftovers
After baking a batch of delicious Melting Moments, you may be left with a few extras (if you’re lucky enough!). Proper storage ensures that these delicate biscuits retain their perfect texture and flavor for as long as possible. Here are the best practices to store your Melting Moments:
-
Cool Completely Before Storing: Before storing your biscuits, make sure they’ve cooled completely. If you store them while still warm, they can become soggy due to condensation. Allow them to cool on a wire rack to ensure they stay crisp and crumbly.
-
Airtight Containers: The best way to store Melting Moments is in an airtight container. This helps prevent the cookies from absorbing moisture from the air and becoming soft. A metal or plastic tin with a tight-fitting lid is perfect for keeping them fresh.
-
Separation with Parchment Paper: If you’re stacking the biscuits in the container, place a sheet of parchment or wax paper between layers to prevent them from sticking together or breaking. This is especially important if you’ve added any fillings or toppings, as it keeps the cookies intact.
-
Room Temperature Storage: You can store your Melting Moments at room temperature for up to a week. Be sure to place the airtight container in a cool, dry place, away from direct sunlight or humidity, which can cause them to lose their texture.
-
Freezing for Long-Term Storage: If you want to keep them longer, you can freeze Melting Moments. Place them in a single layer on a baking sheet and freeze for about an hour before transferring them to an airtight container or freezer-safe bag. This prevents them from sticking together and allows for easier access when you’re ready to enjoy them. Defrost at room temperature when you’re ready to eat, and they should taste as fresh as the day they were baked.
By following these storage tips, you can enjoy the soft, crumbly goodness of Melting Moments days or even weeks after baking!
What Goes Well With Melting Moments
Mary Berry’s Melting Moments are delightful all on their own, but they can be even more enjoyable when paired with the right accompaniments. Here are some ideas for what goes well with these buttery, melt-in-your-mouth biscuits:
-
Tea or Coffee: Melting Moments are the perfect snack for tea time or coffee breaks. Their delicate flavor complements both hot beverages beautifully. A classic black tea or Earl Grey works wonderfully with the sweet, rich notes of the cookies. For coffee lovers, a smooth cappuccino or a light roast coffee can enhance the biscuits’ buttery texture.
-
Fruit Jams and Preserves: A dollop of fruit jam, such as raspberry, strawberry, or apricot, pairs wonderfully with Melting Moments. The sweetness and slight tartness of the jam provide a lovely contrast to the cookies’ richness. You can also try pairing them with lemon curd for a bright, citrusy twist.
-
Whipped Cream or Clotted Cream: A generous swirl of whipped cream or clotted cream on the side makes for an indulgent pairing with Melting Moments. The rich, silky texture of the cream complements the crumbly, buttery cookie beautifully, making each bite feel like a luxurious treat.
-
Ice Cream Sandwiches: For an extra special treat, use Melting Moments as the base for an ice cream sandwich. You can use a flavor like vanilla bean, chocolate, or even a fruity sorbet to fill the center. This is a great way to elevate the cookies for a summer dessert or a festive occasion.
-
Fresh Berries: Fresh berries like strawberries, raspberries, or blueberries add a pop of freshness to the richness of the Melting Moments. You can serve them alongside the cookies or even incorporate them into a simple fruit salad to create a more vibrant dessert spread.
-
Chocolate: Melting Moments are excellent when paired with dark, milk, or white chocolate. You can dip the cookies in melted chocolate, drizzle it over them, or serve them alongside a chocolate fondue for a fun and interactive dessert experience.
By pairing Melting Moments with these delightful options, you can create a well-rounded, indulgent treat that’s perfect for any occasion.
Conclusion
Mary Berry’s Melting Moments are the epitome of what a great biscuit should be: tender, buttery, and utterly irresistible. With their delicate texture and rich flavor, they’ve earned their place as a favorite among home bakers and sweet treat lovers alike. Whether you stick with the classic recipe or explore fun variations like adding citrus zest, chocolate chips, or a salted caramel filling, these cookies offer versatility and endless possibilities for customization.
When it comes to storing leftovers, ensuring they are kept in an airtight container in a cool, dry place will keep them fresh for days or even weeks, so you can savor them longer. And when it comes to pairing, there are countless options that elevate the experience-be it a cup of tea, a dollop of cream, or a few fresh berries.
Ultimately, Mary Berry’s Melting Moments are a timeless recipe that can be adapted and enjoyed in many ways, and their light, buttery texture will always melt hearts, no matter how you serve them. So, whether you’re baking for a gathering or simply indulging in a sweet moment for yourself, these little biscuits are bound to leave you craving more.
FAQs
What Are Melting Moments?
Melting Moments are soft, buttery biscuits that have a crumbly texture and literally melt in your mouth. They are often filled with a smooth buttercream or jam, making them a delightful treat for any occasion.
What Makes Mary Berry’s Melting Moments Special?
Mary Berry’s Melting Moments are special due to their perfectly balanced texture. The recipe emphasizes a light, airy feel in the biscuit, and the buttercream filling adds a rich, smooth flavor that complements the biscuits perfectly.
What Ingredients Do I Need For Mary Berry’s Melting Moments?
To make Mary Berry’s Melting Moments, you’ll need butter, icing sugar, plain flour, cornflour, and vanilla extract for the biscuit dough. For the filling, you’ll need butter, icing sugar, and a little bit of jam, if desired.
Can I Use Margarine Instead Of Butter In Mary Berry’s Melting Moments?
It’s best to use butter for the best flavor and texture. Margarine may not give the same rich taste or melt-in-your-mouth consistency, though it could still work as a substitute in a pinch.
How Do I Make The Dough For Mary Berry’s Melting Moments?
To make the dough, start by creaming the butter and icing sugar together until light and fluffy. Sift together the plain flour and cornflour, then gradually add them to the butter mixture. Once the dough comes together, roll it into small balls and flatten them slightly before baking.
How Long Should I Bake Mary Berry’s Melting Moments?
Bake the biscuits in a preheated oven at 160°C (140°C for fan ovens) or 325°F for around 10-12 minutes, until they are just lightly golden around the edges. They should remain pale in color for the best texture.
Can I Add Flavoring To The Melting Moments Dough?
Yes, you can add a few drops of almond extract or lemon zest to the dough for a different flavor profile. Just be sure not to overpower the delicate texture of the biscuit.
How Do I Assemble Mary Berry’s Melting Moments?
Once the biscuits are baked and cooled, you can fill them with a generous amount of buttercream. You can also add a small spoonful of jam between the biscuits if you like a fruity filling, and then sandwich them together.
How Do I Store Mary Berry’s Melting Moments?
Store your Melting Moments in an airtight container at room temperature. They will stay fresh for about 3-4 days. If you want to keep them longer, you can refrigerate them for up to a week.
Can I Freeze Mary Berry’s Melting Moments?
Yes, you can freeze the baked, unfilled biscuits for up to a month. Once cooled, place them in an airtight container or freezer bag. When ready to enjoy, simply thaw at room temperature and add the filling before serving.
![Mary Berry Glazed Chicken With Cucumber Salsa Recipe [Tips & Tricks]](https://famousyummyrecipes.com/wp-content/uploads/2025/03/glazed-chicken-with-cucumber-salsa.jpg)
![Mary Berry Date And Walnut Cake Recipe [Tips & Tricks]](https://famousyummyrecipes.com/wp-content/uploads/2025/03/date-and-walnut-cake.jpg)
![Mary Berry Broccoli And Quinoa Salad Recipe [Tips & Tricks]](https://famousyummyrecipes.com/wp-content/uploads/2025/03/broccoli-and-quinoa-salad.jpg)
![Mary Berry Hoisin Chicken Recipe [Tips & Tricks]](https://famousyummyrecipes.com/wp-content/uploads/2025/03/hoisin-chicken.jpg)
![Mary Berry Cod And Spinach With Gremolata Recipe [Tips & Tricks]](https://famousyummyrecipes.com/wp-content/uploads/2025/03/cod-and-spinach-with-gremolata.jpg)
![Mary Berry Chicken Spinach And Tomato Lasagne Recipe [Tips & Tricks]](https://famousyummyrecipes.com/wp-content/uploads/2025/03/chicken-spinach-and-tomato-lasagne.jpg)