
Mary Berry Honey Loaf Recipe [Tips & Tricks]
Note: This page contains affiliate links.
As an Amazon Associate, I earn from qualifying purchases when you click on the link, but you are not charged extra.
If you’re on the hunt for a simple yet delicious treat to bake, you absolutely have to try Mary Berry’s honey loaf recipe!
It combines the rich sweetness of honey with a soft, moist texture that will make every bite feel like a little piece of heaven. Mary Berry, known for her foolproof recipes, really nails the balance between flavors here, creating a loaf that’s perfect for tea time or as a comforting snack. Plus, it’s easy to make, and the ingredients are basic enough to keep you from feeling overwhelmed. So, whether you’re a seasoned baker or a beginner, this honey loaf will impress everyone who gets a taste!
Mary Berry Honey Loaf Recipe
Ingredients Needed
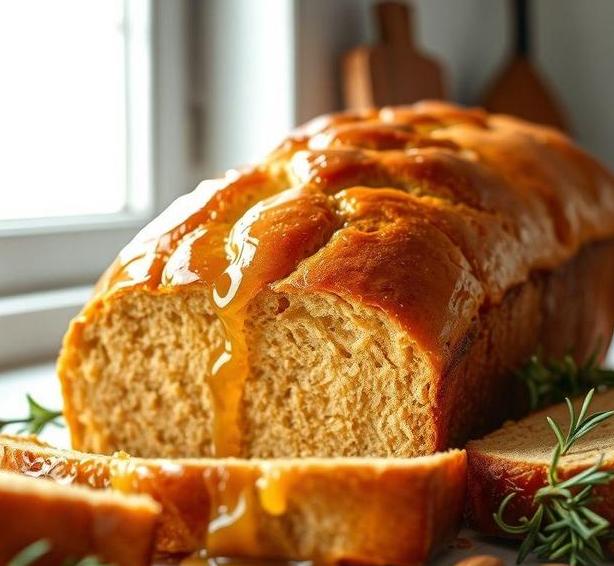
Mary Berry’s Honey Loaf is a delightful, moist cake that combines the rich sweetness of honey with the soft texture of a traditional sponge. To recreate this classic at home, you’ll need the following ingredients:
-
Self-raising Flour (225g)
The base of the cake, self-raising flour helps to give the loaf its soft, airy texture by already containing a rising agent. If you don’t have self-raising flour, you can use plain flour and add a teaspoon of baking powder to achieve the same result.
-
Butter (125g)
Butter adds richness and moisture to the loaf, making it tender. It also contributes to the cake’s golden color. For the best texture, make sure to use softened butter so it blends easily into the batter.
-
Soft Brown Sugar (100g)
This sugar is perfect for adding a hint of caramel-like flavor to the cake. It also helps with moisture retention, ensuring the loaf stays soft even after a few days.
-
Honey (4 tablespoons)
The star ingredient!
Honey brings natural sweetness and depth to the cake, with a slight floral flavor that makes it so special. You can experiment with different varieties of honey (like wildflower or clover honey) to see how they affect the overall flavor.
-
Eggs (2 large)
Eggs provide structure and stability to the cake, allowing it to rise and hold its shape. They also add moisture and help bind the ingredients together.
-
Milk (2 tablespoons)
Milk adds a slight richness and helps to loosen the batter, ensuring it’s not too thick. It balances the density of the other ingredients and helps create a smooth batter.
-
Baking Powder (1 teaspoon)
Although self-raising flour already has some leavening agents, a bit of additional baking powder ensures that the loaf will rise perfectly and maintain a light texture.
-
Vanilla Extract (1 teaspoon)
The vanilla extract adds a wonderful aroma and flavor that complements the honey and brown sugar, creating a beautifully balanced cake.
Equipment Needed
To bake Mary Berry’s Honey Loaf, you don’t need any fancy equipment, but a few key tools will make the process smooth and successful. Here’s what you’ll need:
-
Loaf Tin (approximately 2lb)
A standard 2lb loaf tin is perfect for this recipe. It ensures that the batter bakes evenly, providing a nice rise without overflowing. Make sure to grease and line the tin to prevent the cake from sticking.
-
Mixing Bowls
You’ll need a couple of mixing bowls-one for wet ingredients (like the butter, eggs, and honey) and another for the dry ingredients (such as flour, baking powder, and sugar). This helps to keep the process organized.
-
Electric Mixer or Whisk
Using an electric mixer is the easiest way to cream the butter and sugar together and incorporate the eggs smoothly. However, a hand whisk can also do the job, though it might require a bit more effort to get everything blended evenly.
-
Measuring Cups and Spoons
Accurate measurements are key to achieving the perfect texture, so make sure to have your measuring cups and spoons handy. This ensures you’re adding the right amounts of ingredients, especially when working with liquids like honey and milk.
-
Spatula or Wooden Spoon
A spatula is great for scraping down the sides of your bowl, ensuring no ingredients are left behind. It’s also useful for folding in the flour without overworking the batter.
-
Cooling Rack
After baking, place your loaf on a cooling rack. This helps the cake to cool evenly and prevents it from becoming soggy at the bottom.
How To Make Mary Berry’s Honey Loaf
Making Mary Berry’s Honey Loaf is a straightforward process that requires minimal effort but results in a wonderfully flavorful cake. Here’s how to do it:
-
Preheat the Oven
Start by preheating your oven to 160°C (325°F) or 140°C (275°F) for fan ovens. This ensures that the oven is hot and ready when you put your cake in.
-
Prepare the Loaf Tin
Grease your loaf tin with butter or line it with parchment paper. This step ensures your cake doesn’t stick to the sides and comes out smoothly after baking.
-
Cream the Butter and Sugar
In a large mixing bowl, beat together the softened butter and the soft brown sugar until the mixture becomes light and fluffy. This will usually take about 3-4 minutes with an electric mixer, or a little longer by hand. Creaming the butter and sugar properly is essential to achieving a light texture in the loaf.
-
Add the Eggs
Crack the eggs into the mixture, one at a time, beating well after each addition. If the mixture starts to curdle, you can add a tablespoon of flour to help bring it together.
-
Incorporate the Honey and Vanilla
Stir in the honey and vanilla extract, ensuring everything is well combined. The honey will lend a delightful sweetness and an aromatic flavor to the cake, which sets it apart from other loaves.
-
Sift the Dry Ingredients
In a separate bowl, sift together the self-raising flour and baking powder. This step ensures that there are no lumps in the dry ingredients and that the leavening agents are evenly distributed throughout the flour.
-
Fold in the Dry Ingredients
Gradually fold the sifted flour into the wet mixture, adding a bit at a time. Be gentle when folding to avoid deflating the batter. Once all the flour is incorporated, add the milk to loosen the batter and make it easier to pour.
-
Bake the Cake
Pour the batter into the prepared loaf tin and smooth the top with a spatula. Bake in the preheated oven for about 50-60 minutes.
The cake is done when it’s golden brown, and a skewer inserted into the center comes out clean. If the top starts to brown too quickly, cover the loaf loosely with foil to prevent overbaking.
-
Cool and Serve
Once baked, remove the loaf from the oven and allow it to cool in the tin for about 10 minutes. Then, transfer it to a wire rack to cool completely before slicing. This helps maintain the texture and prevents the loaf from being too soft when cutting.
Expert Tips
-
Room Temperature Ingredients: For the best results, make sure your butter and eggs are at room temperature. Cold ingredients can cause the batter to curdle or not mix evenly.
-
Don’t Overmix: When folding the flour into the wet ingredients, mix just enough to combine everything. Overmixing can lead to a denser loaf as it will cause the gluten in the flour to develop too much.
-
Test for Doneness: Every oven is different, so start checking the loaf after about 50 minutes by inserting a skewer. If it comes out clean, the cake is ready. If it’s still wet, bake for an additional 5-10 minutes.
-
Add Extra Honey Drizzle: If you want to add an extra touch of sweetness, consider drizzling a little more honey over the top of the loaf once it has cooled. This will enhance the honey flavor and create a glossy finish.
Mary Berry’s Honey Loaf is a classic British cake that combines simple ingredients and a few easy steps to produce a moist, flavorful treat. The natural sweetness of honey, balanced by the depth of soft brown sugar and the richness of butter, makes for a loaf that’s not only easy to prepare but absolutely delicious.
Perfect for tea time, a snack, or even as a thoughtful homemade gift, this cake will surely become a favorite in your recipe collection. With a few expert tips, you can perfect the texture and flavor to make it uniquely your own. So, gather your ingredients, follow the steps, and enjoy the comforting, golden goodness of Mary Berry’s Honey Loaf.
Easy Recipe Variations For Mary Berry’s Honey Loaf
Mary Berry’s honey loaf is a beloved classic, celebrated for its simple yet rich flavor profile, which balances the sweet nectariness of honey with the soft, moist texture of a homemade cake. However, just because the original recipe is delightful, doesn’t mean you can’t experiment a little. Here are some easy variations that will take your honey loaf to new heights while keeping the spirit of the recipe intact.
-
Add Fruits For A Natural Sweetness Boost
One of the easiest and most delicious variations to Mary Berry’s honey loaf is incorporating fruits into the batter. Think about adding chunks of fresh apples, pears, or even berries like blueberries and raspberries.
The moisture from the fruit will enhance the loaf’s softness, while their natural sweetness will complement the honey’s flavor. For a twist, you could fold in dried fruits like sultanas, raisins, or chopped apricots. Not only do these additions give the loaf an inviting appearance, but they also make each bite more complex and interesting.
-
Spice It Up With Warm Flavors
Honey pairs beautifully with a variety of warm spices. If you’re craving something a bit more aromatic, consider adding ground cinnamon, nutmeg, or ginger to the batter.
These spices will deepen the flavor of the loaf, creating a comforting, cozy vibe-perfect for colder months or any time you’re looking for a bit of warmth in your baking. A touch of vanilla extract will also add depth and create a beautifully fragrant aroma as the loaf bakes.
-
Incorporate Nuts For Crunch And Texture
Nuts can add a satisfying crunch to the soft and tender texture of honey loaf. Try adding chopped walnuts, hazelnuts, or pecans to the batter for a delightful contrast to the soft crumb.
Not only do they contribute a crunchy texture, but their subtle earthy flavors pair wonderfully with honey’s sweetness. You could also sprinkle chopped nuts on top of the loaf before baking for an added visual appeal and an extra layer of texture.
-
Make It Lighter With Greek Yogurt
For those seeking a lighter, slightly tangy variation of honey loaf, replacing some of the butter or oil with Greek yogurt can work wonders. Greek yogurt will keep the loaf moist while adding a slight tanginess that contrasts beautifully with the honey’s sweetness. This variation is also a great way to boost the protein content of the loaf, making it a more balanced treat.
-
Infuse It With Citrus Zest
Adding citrus zest, such as lemon, orange, or even lime, to the batter will give the loaf a fresh and zesty undertone. This not only brightens the flavor profile but also provides a light, refreshing contrast to the richness of the honey. A drizzle of citrus glaze over the cooled loaf would enhance this flavor even further, making it a perfect summer snack or dessert.
Best Practices To Store Leftovers

Storing leftovers from your honey loaf properly ensures that the cake retains its moistness, flavor, and texture for several days, making it just as enjoyable on day two (or three!) as it was when freshly baked. Here are some best practices to ensure your honey loaf stays delicious:
-
Cool Before Storing
After baking your honey loaf, let it cool completely at room temperature before storing it. If you store it while it’s still warm, condensation can build up inside the container, making the loaf soggy and potentially leading to mold growth.
-
Wrap It Tight
Once cooled, wrap your honey loaf tightly in plastic wrap or aluminum foil. This helps to lock in moisture and prevents the loaf from drying out. For added protection, you can place the wrapped loaf inside an airtight container, ensuring no air or moisture can get in.
-
Refrigeration For Extended Freshness
If you plan to store the loaf for more than a few days, refrigeration is a good option. While the fridge can slightly alter the texture of the loaf by making it firmer, it will preserve it longer. For a firmer texture, simply warm up slices in the microwave or toaster before serving.
-
Freezing For Long-Term Storage
Honey loaf freezes beautifully, making it a great option for preparing ahead of time or saving leftovers. To freeze, slice the loaf into individual portions and wrap each slice tightly in plastic wrap.
Then, place the wrapped slices in a freezer bag or airtight container. This will ensure the loaf stays fresh for up to three months. When you’re ready to enjoy it, simply thaw at room temperature or microwave the slices for a few seconds for a soft, fresh taste.
What Goes Well With Honey Loaf
Mary Berry’s honey loaf is a versatile treat that pairs wonderfully with a wide variety of accompaniments. Whether you’re serving it for breakfast, dessert, or an afternoon tea, these ideas will elevate your honey loaf experience:
-
Clotted Cream Or Whipped Cream
The richness of clotted cream or lightly whipped cream complements the sweetness of the honey loaf, creating a luxurious mouthfeel. This pairing is especially delightful when serving the loaf for afternoon tea. The cream balances the flavors, giving a bit of indulgence without overpowering the delicate sweetness of the honey.
-
Tea Or Coffee
As a quintessential British treat, honey loaf pairs perfectly with a cup of tea or coffee. The warm, slightly bitter notes of black tea or a strong cup of coffee help cut through the sweetness of the loaf, providing a well-rounded, satisfying experience. If you prefer something a bit more decadent, a latte or cappuccino would be a lovely option, adding a creamy touch that complements the loaf’s texture.
-
Fresh Fruit
A refreshing side of fresh fruit, such as berries, sliced apples, or citrus segments, can balance out the richness of the loaf. The acidity and freshness of the fruit help cleanse the palate, making it easier to enjoy multiple slices without feeling overly sweet. A drizzle of honey over the fruit can further tie the elements together, creating a harmonious and vibrant plate.
-
Yogurt Or Ice Cream
For a more indulgent treat, serve slices of honey loaf with a scoop of vanilla ice cream or a dollop of yogurt. The coolness of the ice cream contrasts beautifully with the soft, honeyed texture of the loaf, while the yogurt adds a tangy element that cuts through the sweetness. This pairing is perfect for a dessert or a special occasion.
Conclusion
Mary Berry’s honey loaf is the epitome of simple, comforting baking-a moist, golden treat that’s perfect for almost any occasion. With its subtle sweetness and soft texture, it provides the ideal base for endless flavor variations, from adding fruits and nuts to infusing it with spices or citrus. The versatility of the loaf ensures that there’s always something new to try, whether you’re looking to experiment or enjoy it as is.
Storing leftovers properly is just as important as baking the loaf itself, as it helps maintain the freshness and texture. By following best practices like wrapping tightly and refrigerating or freezing, you can ensure your honey loaf stays delicious long after the first slice.
And when it comes to pairing, there’s no shortage of options. From a cup of tea to a scoop of ice cream, honey loaf is adaptable to a wide range of accompaniments, each enhancing the flavors in its own way. In the end, whether you enjoy it alone or with friends, as a snack or dessert, Mary Berry’s honey loaf remains a timeless, delectable treat for all to enjoy.
FAQs
What Ingredients Are Needed For Mary Berry’s Honey Loaf?
For Mary Berry’s Honey Loaf, you’ll need the following ingredients: 225g self-raising flour, 115g unsalted butter (softened), 150g honey, 2 large eggs, 75g caster sugar, 2 tablespoons milk, and a pinch of salt.
Can I Use A Different Type Of Flour In Mary Berry’s Honey Loaf?
While self-raising flour is recommended for Mary Berry’s Honey Loaf, you can substitute it with plain flour and add 2 teaspoons of baking powder to ensure the loaf rises properly.
How Long Does It Take To Bake Mary Berry’s Honey Loaf?
Mary Berry’s Honey Loaf typically takes around 45-55 minutes to bake at 160°C (fan oven) or 180°C (conventional oven). It’s important to check the loaf towards the end of baking with a skewer to ensure it’s fully cooked.
How Do I Know When Mary Berry’s Honey Loaf Is Done Baking?
To check if your Honey Loaf is done, insert a skewer or toothpick into the center of the loaf. If it comes out clean or with just a few crumbs, the loaf is ready. If the skewer comes out wet, bake for a few more minutes.
Can I Add Other Ingredients To Mary Berry’s Honey Loaf?
Yes!
You can customize Mary Berry’s Honey Loaf by adding ingredients like chopped nuts (e.g., walnuts or almonds), dried fruits (e.g., raisins or sultanas), or spices (like cinnamon or ginger) to enhance the flavor.
Is Mary Berry’s Honey Loaf Suitable For A Gluten-free Diet?
To make Mary Berry’s Honey Loaf gluten-free, substitute the self-raising flour with a gluten-free flour blend and ensure that the baking powder used is also gluten-free. The texture may vary slightly, but it should still work well.
Can I Use Honey Substitutes In Mary Berry’s Honey Loaf?
Yes, you can replace honey with maple syrup or golden syrup if preferred. These substitutes will give a slightly different flavor, but they will still produce a delicious loaf.
How Should I Store Mary Berry’s Honey Loaf?
Store Mary Berry’s Honey Loaf in an airtight container at room temperature for up to 3-4 days. If you want to keep it longer, you can freeze it for up to 3 months. Make sure to wrap it well in plastic wrap and foil before freezing.
Can I Make Mary Berry’s Honey Loaf In Advance?
Yes, you can make Mary Berry’s Honey Loaf a day or two in advance. In fact, the loaf often tastes even better after a day or two as the flavors meld together. Just keep it stored in an airtight container.
What Can I Serve With Mary Berry’s Honey Loaf?
Mary Berry’s Honey Loaf is delicious on its own, but you can serve it with butter, cream cheese, or a dollop of fruit jam for extra flavor. It also pairs well with a cup of tea for a comforting snack.
![Mary Berry Swiss Chicken Spinach And Mushroom Bake Recipe [Tips & Tricks]](https://famousyummyrecipes.com/wp-content/uploads/2025/03/swiss-chicken-spinach-and-mushroom-bake.jpg)
![Mary Berry Salmon En Croute Recipe [Tips & Tricks]](https://famousyummyrecipes.com/wp-content/uploads/2025/03/salmon-en-croute.jpg)
![Mary Berry Beef Casserole Recipe [Tips & Tricks]](https://famousyummyrecipes.com/wp-content/uploads/2025/03/beef-casserole.jpg)
![Mary Berry Smoked Salmon Canape Sandwiches Recipe [Tips & Tricks]](https://famousyummyrecipes.com/wp-content/uploads/2025/03/smoked-salmon-canape-sandwiches.jpg)
![Mary Berry Chocolate Cappuccino Tart Recipe [Tips & Tricks]](https://famousyummyrecipes.com/wp-content/uploads/2025/03/chocolate-cappuccino-tart.jpg)
![Mary Berry Leek And Potato Gratin Recipe [Tips & Tricks]](https://famousyummyrecipes.com/wp-content/uploads/2025/03/leek-and-potato-gratin.jpg)