
Mary Berry Easy Vanilla Ice Cream Recipe [Tips & Tricks]
Note: This page contains affiliate links.
As an Amazon Associate, I earn from qualifying purchases when you click on the link, but you are not charged extra.
If you’re looking for a simple yet delicious way to make homemade ice cream, Mary Berry’s easy vanilla ice cream recipe is a must-try!
With just a few basic ingredients and minimal effort, you can create a creamy, dreamy dessert that rivals anything you’d find in a store. Mary Berry’s approach is straightforward, making it perfect for beginners or anyone who wants a quick, no-fuss treat. Plus, there’s something so satisfying about homemade ice cream, and the rich, natural vanilla flavor will have everyone coming back for more. Give it a go – it’s guaranteed to become a family favorite!
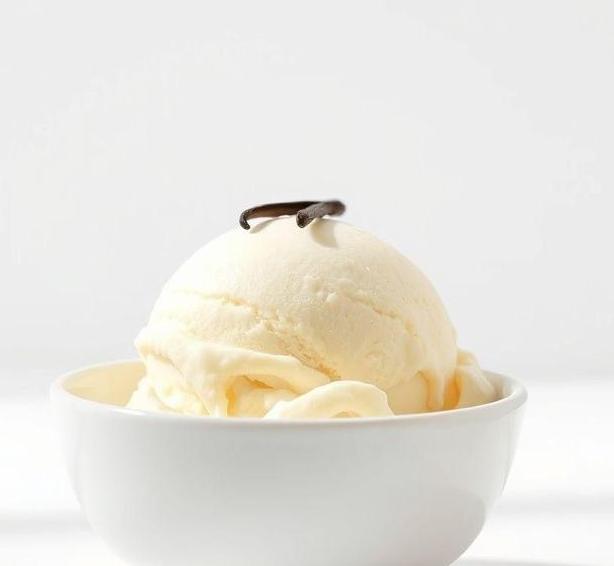
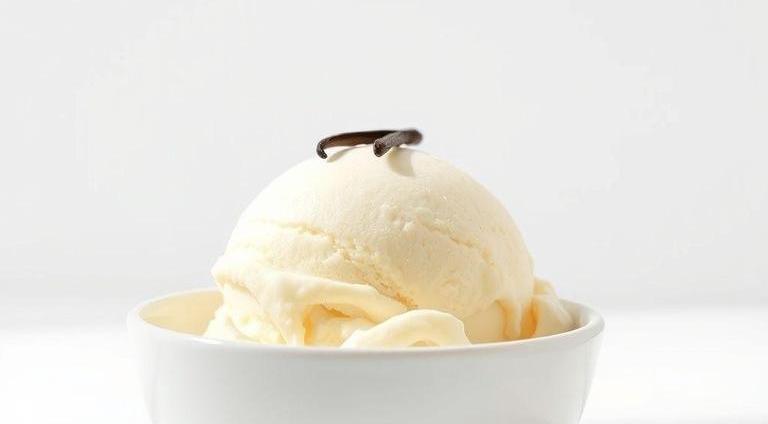
Mary Berry Easy Vanilla Ice Cream Recipe
Ingredients Needed
Making Mary Berry’s Easy Vanilla Ice Cream requires simple, high-quality ingredients that come together to create a rich, creamy dessert. Here’s what you’ll need:
-
Double Cream (or Heavy Cream): This is the base for your ice cream, giving it a luxurious, smooth texture and rich flavor. It’s essential for achieving the creaminess that makes this ice cream so irresistible.
-
Full-Fat Milk: Milk helps balance the richness of the double cream, creating the perfect consistency without being overly heavy.
-
Caster Sugar: This fine sugar dissolves easily into the cream and milk mixture, ensuring the ice cream has the right sweetness. Caster sugar is preferred over granulated sugar for its smooth texture.
-
Vanilla Extract: For that signature vanilla flavor, high-quality vanilla extract is a must. The extract adds depth and warmth to the ice cream, making it feel like a treat straight from an artisan gelato shop.
-
Egg Yolks: The egg yolks serve as a natural emulsifier. They help bind the fats in the cream and milk, making the texture of the ice cream smooth and velvety. Additionally, the egg yolks contribute to the richness and flavor of the ice cream.
These ingredients come together effortlessly, creating a balanced foundation for the ice cream. The combination of cream, milk, sugar, and vanilla allows for a deliciously decadent ice cream without the need for any fancy equipment or hard-to-find ingredients.
Equipment Needed
Making Mary Berry’s Easy Vanilla Ice Cream requires very little in terms of equipment, so it’s a great recipe for home cooks. Here’s what you’ll need:
-
Mixing Bowl: A large bowl to combine the cream, milk, sugar, and egg yolks. A metal or glass bowl works best, as it allows for even mixing and is easy to clean.
-
Whisk: A hand whisk or electric mixer will help you whip the cream and eggs. A whisk is also essential for beating the egg yolks to prevent them from scrambling when incorporated into the hot milk mixture.
-
Saucepan: You’ll need a small saucepan to heat the milk and sugar mixture. The gentle heat helps dissolve the sugar and creates the base for the ice cream.
-
Freezer-Safe Container: Once the ice cream base is ready, you’ll need a shallow, freezer-safe container to freeze the mixture. A metal pan is ideal as it helps cool the ice cream faster, leading to a smoother texture.
-
Ice Cream Maker (Optional): While this recipe doesn’t strictly require an ice cream maker, using one can speed up the freezing process and result in an even smoother texture. If you don’t have one, don’t worry – the recipe can still be made by stirring the mixture by hand every 30 minutes to break up ice crystals.
-
Strainer: A fine-mesh strainer helps remove any solids from the egg and milk mixture, ensuring the final ice cream is silky smooth.
How To Make Mary Berry’s Easy Vanilla Ice Cream
Making Mary Berry’s Easy Vanilla Ice Cream is both a rewarding and simple process. Follow these steps to create a delicious homemade treat:
-
Prepare the Milk and Sugar Base: Start by combining the full-fat milk and caster sugar in a small saucepan. Heat over a medium-low flame until the sugar completely dissolves into the milk. Stir occasionally to avoid scorching. Once the mixture is smooth and warm, remove it from the heat.
-
Whisk the Egg Yolks: While the milk mixture is heating up, whisk the egg yolks in a separate mixing bowl until they are pale and slightly thickened. This process is crucial for ensuring that the final ice cream has a smooth, velvety texture.
-
Temper the Eggs: Slowly pour a small amount of the hot milk mixture into the whisked egg yolks, stirring continuously to avoid cooking the eggs. This process, known as tempering, prevents the yolks from curdling. Gradually add the rest of the warm milk to the egg mixture, stirring until well combined.
-
Cook the Custard: Return the egg and milk mixture to the saucepan and cook over low heat, stirring constantly with a wooden spoon or silicone spatula. Continue cooking until the mixture thickens slightly and coats the back of the spoon. Be cautious not to overheat or boil, as this can cause the eggs to scramble.
-
Strain and Cool: Once the custard has thickened, strain it through a fine-mesh sieve into a clean bowl to remove any bits of cooked egg. Stir in the double cream and vanilla extract, which will cool down the custard and enhance the flavor.
-
Chill the Custard: Allow the mixture to cool to room temperature, then place it in the fridge to chill for at least 3-4 hours, or overnight if possible. Chilling the base allows the flavors to meld together and ensures a smoother texture when frozen.
-
Freeze the Mixture: Once chilled, if you have an ice cream maker, pour the mixture into the machine and churn according to the manufacturer’s instructions. If you don’t have an ice cream maker, transfer the mixture to a shallow freezer-safe container and freeze, stirring vigorously every 30 minutes to break up any ice crystals. After 3-4 hours, your homemade vanilla ice cream will be ready to serve.
Expert Tips
To elevate your homemade ice cream game, consider these expert tips:
-
Use High-Quality Ingredients: The better the ingredients, the better your ice cream will taste. Invest in fresh, local dairy, and opt for a premium vanilla extract rather than imitation vanilla flavoring. The simplicity of the recipe means these ingredients will shine.
-
Properly Temper the Eggs: Be patient and slowly pour the hot milk into the eggs while whisking constantly. This is the key step to avoid scrambling the yolks. If you go too fast, you may end up with a lumpy texture instead of a smooth, creamy ice cream.
-
Chill the Custard Thoroughly: Cooling the custard before freezing ensures the ice cream churns more efficiently. This step is particularly important if you’re using an ice cream maker, as it helps create the perfect smooth texture. If not using an ice cream maker, the freezing and stirring process is essential for preventing large ice crystals.
-
Add-ins and Variations: Once you’ve mastered the base, feel free to experiment by adding chopped fruit, chocolate chips, or swirl-ins like caramel or berry sauces during the final freezing stage. You can also try adding a dash of alcohol (like vanilla liqueur) to prevent the ice cream from becoming too hard when frozen.
-
Serve at the Right Temperature: Homemade ice cream can become very firm after freezing, especially without stabilizers found in store-bought versions. Let the ice cream sit out for 5-10 minutes before scooping to make serving easier.
Mary Berry’s Easy Vanilla Ice Cream is the epitome of a classic, comforting dessert. The recipe’s simplicity allows you to enjoy a luxurious, creamy treat without the need for complicated equipment or ingredients.
From the first spoonful, you’ll appreciate the rich vanilla flavor and smooth texture that come from using just a few high-quality ingredients. Whether you use an ice cream maker or simply freeze the mixture by hand, the results will be nothing short of satisfying. Perfect for summer gatherings, family dinners, or just because, this ice cream proves that sometimes the best things come in the simplest forms.
Easy Recipe Variations For Mary Berry’s Easy Vanilla Ice Cream
Mary Berry’s Easy Vanilla Ice Cream recipe is already a classic, but there’s so much room for creativity if you want to personalize it!
Whether you’re in the mood for a flavor twist or a fun mix-in, here are some delightful variations to elevate this simple yet scrumptious treat.
1. Chocolate Chip Vanilla Ice Cream
Add texture and a little indulgence to your vanilla ice cream by mixing in some mini chocolate chips. Simply stir the chips into the mixture before freezing or fold them in after the ice cream has set slightly, depending on your preference for how well they are distributed. For an extra luxurious twist, you could melt some chocolate and swirl it through for a marbled effect.
2. Strawberry Or Raspberry Swirl
A fruity swirl brings a vibrant pop of color and a burst of fresh flavor to Mary Berry’s easy vanilla ice cream. Puree fresh or frozen strawberries (or raspberries) with a touch of sugar and lemon juice to create a tangy fruit sauce.
After churning the ice cream base, gently swirl the fruit puree into the mixture and freeze. The fruity ribbons will add a nice tart contrast to the creamy vanilla.
3. Caramelized Banana Ice Cream
Banana and vanilla are a classic combination. For a fun twist, try adding caramelized bananas.
Slice ripe bananas and sauté them in a little butter and brown sugar until they’re soft and golden. Allow them to cool and gently fold them into the vanilla ice cream base. This will add a rich, caramelized sweetness and a hint of banana flavor to the ice cream, giving it a beautiful depth.
4. Coffee And Hazelnut
For a more adult twist, why not infuse the base with some coffee?
Simply brew a strong espresso or use instant coffee powder and add it to the cream mixture. Hazelnuts are a natural complement to coffee, so folding in some crushed toasted hazelnuts just before freezing will add a pleasant crunch and earthy flavor. This variation will be a treat for coffee lovers!
5. Lemon And Poppy Seed Ice Cream
To add a zesty and refreshing twist, try adding lemon zest and a few teaspoons of poppy seeds. The bright citrus flavor will pair beautifully with the rich creaminess of the ice cream, while the poppy seeds provide a little crunch and visual interest. This is a great option for those looking for a light and refreshing variation of vanilla ice cream.
6. Spiced Cinnamon Vanilla Ice Cream
For a cozy, warming variation, add ground cinnamon and a pinch of nutmeg or clove to the vanilla base. The gentle spicing will give your ice cream a lovely fall-inspired flavor without overpowering the sweetness of the vanilla. This version is perfect for cooler months or for anyone who enjoys spiced desserts.
Each of these variations provides a unique twist on Mary Berry’s original vanilla ice cream, and all can be made with just a few simple ingredients. You can play around with your favorite flavors and textures to create your ideal frozen dessert!
Best Practices To Store Leftovers
Once you’ve made a batch of this delightful homemade ice cream, you’ll want to make sure it stays fresh for as long as possible. Proper storage ensures that the ice cream remains creamy and doesn’t turn into an icy, grainy mess. Here are some best practices to store your leftover ice cream:
1. Use An Airtight Container
The most crucial factor in storing homemade ice cream is to use an airtight container. This prevents the ice cream from absorbing odors from the freezer and helps maintain its texture. Choose a shallow, wide container rather than a deep, narrow one to allow the ice cream to freeze evenly and be easier to scoop.
2. Cover The Ice Cream With Plastic Wrap
Before sealing the container, press a layer of plastic wrap directly onto the surface of the ice cream. This prevents air from getting trapped between the ice cream and the lid, which can cause ice crystals to form. If you want to further protect your ice cream, you can wrap it in parchment paper before placing it in the airtight container.
3. Freeze Quickly
Make sure to place the ice cream in the freezer as soon as possible after making it. The quicker it freezes, the smoother the texture will remain. If you’re storing ice cream that was made in an ice cream machine, try to place it in the freezer for at least 4-6 hours before serving.
4. Avoid Frequent Thawing And Refreezing
One of the biggest challenges in homemade ice cream storage is thawing and refreezing. Each time the ice cream thaws, it will lose some of its creamy texture, and ice crystals will begin to form. To avoid this, try to only take out the amount you plan to serve and return the rest back to the freezer quickly.
5. Keep The Freezer At The Right Temperature
To keep your ice cream at its best, maintain a constant freezing temperature of around -18°C (0°F). A more erratic temperature will cause the ice cream to freeze and thaw at inconsistent rates, leading to freezer burn and an altered texture.
By following these simple storage practices, you can keep your vanilla ice cream fresh, smooth, and delicious for up to a month or even longer, depending on your freezer’s conditions.
What Goes Well With Easy Vanilla Ice Cream
Vanilla ice cream is incredibly versatile and pairs well with a wide variety of ingredients. Whether you want to create an indulgent sundae or a sophisticated dessert, here are a few pairings to elevate your treat:
1. Fresh Fruit
Fresh fruit and vanilla ice cream are a match made in heaven. The sweetness of the ice cream balances the tartness of fruits like strawberries, raspberries, blueberries, or peaches.
You can slice the fruit and serve it on the side, or drizzle with a little honey or fruit syrup for extra flavor. For a refreshing contrast, citrus fruits like oranges and lemon segments work particularly well, too.
2. Chocolate Sauce Or Hot Fudge
For the ultimate indulgence, pour some warm chocolate sauce or hot fudge over your vanilla ice cream. The rich, gooey sauce adds a decadent contrast to the smooth, creamy ice cream. You could also add some crushed nuts or sprinkles for extra texture and flavor.
3. Nuts And Crunchy Toppings
A sprinkle of chopped toasted nuts such as almonds, pecans, or walnuts adds texture and depth to the creamy smoothness of vanilla ice cream. Other crunchy toppings like crumbled cookies (think Oreos, biscotti, or shortbread), granola, or even candied ginger work wonders for providing a delightful contrast in both flavor and texture.
4. Caramel Or Butterscotch
Sweet, buttery caramel or a rich, sticky butterscotch sauce can elevate your vanilla ice cream to a whole new level. The sweet and slightly salty profile of caramel or butterscotch complements the simple sweetness of the ice cream. Drizzle it on top or swirl it through for added decadence.
5. Waffle Cones Or Wafer Biscuits
For a simple yet satisfying option, enjoy your vanilla ice cream in a crisp, crunchy waffle cone. The combination of smooth ice cream and crunchy cone is a timeless classic. You can also use wafer biscuits or shortbread cookies for a similar effect.
6. Espresso Or Coffee
For those who enjoy a more grown-up pairing, a shot of espresso or coffee goes wonderfully with vanilla ice cream. You can pour hot espresso over the ice cream for a ‘affogato’ style treat, or even use it as a dipping sauce. The bitterness of the coffee balances the sweetness of the vanilla perfectly.
These are just a few ideas to create a memorable dessert experience. Whether you prefer fruity, nutty, chocolatey, or something a little more indulgent, vanilla ice cream can easily accommodate any flavor combination!
Conclusion
Mary Berry’s Easy Vanilla Ice Cream is a delightful base for a multitude of delicious variations. With its smooth texture and classic flavor, it offers the perfect foundation to get creative in the kitchen. Whether you’re infusing it with new flavors like coffee or caramelized bananas, or mixing in your favorite crunchy toppings, the possibilities are endless.
Proper storage ensures your homemade treat stays fresh and creamy, ready for when you crave that sweet indulgence. And when it comes to pairing your ice cream, the sky’s the limit-whether you enjoy it with fresh fruit, a drizzle of chocolate sauce, or a sprinkle of nuts, this dessert can be easily personalized to your taste.
No matter how you choose to enjoy it, Mary Berry’s Easy Vanilla Ice Cream is a guaranteed crowd-pleaser, offering both simplicity and elegance in every bite.
FAQs
What Ingredients Do I Need For Mary Berry’s Easy Vanilla Ice Cream Recipe?
The ingredients for Mary Berry’s easy vanilla ice cream recipe are double cream, condensed milk, vanilla extract, and a pinch of salt. These simple ingredients come together to create a rich, creamy ice cream without the need for an ice cream maker.
Do I Need An Ice Cream Maker To Make Mary Berry’s Easy Vanilla Ice Cream?
No, you do not need an ice cream maker to make this recipe. Mary Berry’s easy vanilla ice cream is a no-churn recipe, so you can simply whip the ingredients and freeze them for a smooth, creamy texture.
How Long Does It Take For Mary Berry’s Easy Vanilla Ice Cream To Freeze?
It typically takes about 4-6 hours for Mary Berry’s easy vanilla ice cream to freeze properly. For best results, allow it to freeze overnight to ensure a firm and smooth consistency.
Can I Make Mary Berry’s Easy Vanilla Ice Cream Without Condensed Milk?
Condensed milk is a key ingredient in this recipe, as it helps create a smooth and creamy texture. Replacing it may alter the outcome, but you could experiment with alternatives like evaporated milk or homemade sweetened condensed milk if needed.
What Type Of Cream Is Used In Mary Berry’s Easy Vanilla Ice Cream?
Mary Berry’s recipe calls for double cream, which has a high fat content and ensures the ice cream remains creamy and smooth. Using a lighter cream or substitute may result in a less rich texture.
Can I Add Toppings Or Mix-ins To Mary Berry’s Easy Vanilla Ice Cream?
Absolutely!
While the recipe is simple, you can customize the ice cream by adding mix-ins such as crushed cookies, chocolate chips, or fruit. Just fold them in gently before freezing to prevent them from sinking.
How Do I Store Mary Berry’s Easy Vanilla Ice Cream?
Store the ice cream in an airtight container in the freezer. Be sure to cover the top with parchment paper or plastic wrap to prevent ice crystals from forming on the surface.
Can I Use A Different Flavor Of Extract In Mary Berry’s Easy Vanilla Ice Cream?
Yes, you can substitute the vanilla extract with other flavor extracts such as almond, chocolate, or hazelnut. Just be sure to adjust the amount based on the strength of the extract you’re using.
Why Is My Mary Berry’s Easy Vanilla Ice Cream Icy Or Hard After Freezing?
If your ice cream turns out icy or too hard, it may be due to an imbalance in the ingredients or the freezing process. To avoid this, ensure you’re using full-fat cream, and allow the ice cream to soften slightly before serving if it becomes too firm.
Can I Make A Dairy-free Version Of Mary Berry’s Easy Vanilla Ice Cream?
Yes, you can make a dairy-free version by using coconut cream instead of double cream and a dairy-free sweetened condensed milk alternative. Look for plant-based options to maintain a creamy texture in your ice cream.
![Mary Berry Double Mustard Chicken Recipe [Tips & Tricks]](https://famousyummyrecipes.com/wp-content/uploads/2025/03/double-mustard-chicken.jpg)
![Mary Berry Danish Pastry Recipe [Tips & Tricks]](https://famousyummyrecipes.com/wp-content/uploads/2025/03/danish-pastry.jpg)
![Mary Berry Chocolate Birthday Cake Recipe [Tips & Tricks]](https://famousyummyrecipes.com/wp-content/uploads/2025/03/chocolate-birthday-cake.jpg)
![Mary Berry Pear Apple Strudel Recipe [Tips & Tricks]](https://famousyummyrecipes.com/wp-content/uploads/2025/03/pear-apple-strudel.jpg)
![Mary Berry Canon Of Lamb With Mint Gravy Recipe [Tips & Tricks]](https://famousyummyrecipes.com/wp-content/uploads/2025/03/canon-of-lamb-with-mint-gravy.jpg)
![Mary Berry Rum Truffles Recipe [Tips & Tricks]](https://famousyummyrecipes.com/wp-content/uploads/2025/03/rum-truffles.jpg)