
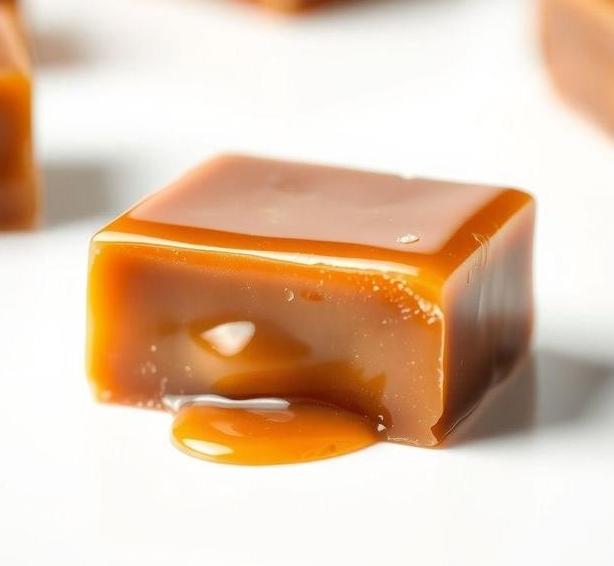
Mary Berry Caramel Square Recipe [Tips & Tricks]
Note: This page contains affiliate links.
As an Amazon Associate, I earn from qualifying purchases when you click on the link, but you are not charged extra.
If you’re looking for a sweet treat that’s both delicious and easy to make, then you absolutely have to try Mary Berry’s caramel square recipe!
This recipe is the perfect balance of buttery shortbread, rich caramel, and smooth chocolate, making every bite a heavenly experience. Whether you’re a seasoned baker or just getting started, Mary Berry’s clear instructions make it a breeze to follow.
Plus, the combination of flavors is so irresistible, you’ll be tempted to make a second batch before the first one even cools down!
Perfect for sharing or indulging on your own, this recipe is a must-try for anyone with a sweet tooth.
Mary Berry Caramel Square Recipe
Ingredients Needed
Mary Berry’s Caramel Squares are a decadent treat that combines buttery shortbread with rich caramel and smooth milk chocolate, creating a mouth-watering dessert that’s sure to impress. Let’s break down the ingredients needed for this indulgent bake:
-
For The Shortbread Base
- Plain flour (250g) – This is the foundation of the shortbread and provides a light, crumbly texture. The flour gives structure to the base, ensuring it holds the caramel and chocolate layers above it.
- Unsalted butter (200g) – The butter adds richness and flavor to the shortbread. It also contributes to the melt-in-the-mouth texture, making the base feel luxurious.
- Caster sugar (100g) – This sugar is finer than regular granulated sugar, allowing it to dissolve easily into the butter and flour, giving the shortbread a smooth sweetness.
- Cornflour (50g) – Cornflour helps to lighten the texture of the shortbread, ensuring it’s tender and not too dense.
-
For The Caramel Layer
- Sweetened condensed milk (397g) – This creamy, sweet milk forms the heart of the caramel layer. It’s thick, rich, and sweet, and when combined with butter and golden syrup, it transforms into a perfectly smooth caramel.
- Golden syrup (2 tablespoons) – Golden syrup adds a distinctive, warm sweetness to the caramel, balancing the richness of the condensed milk and butter.
- Unsalted butter (100g) – Butter helps to create a velvety smooth caramel that holds together beautifully once it sets.
-
For The Chocolate Topping
- Milk chocolate (200g) – The creamy milk chocolate melts perfectly over the caramel, forming a glossy, indulgent topping. It’s essential for adding the final touch of sweetness and richness.
- Dark chocolate (50g, optional) – Some variations of the recipe include a small amount of dark chocolate to balance the sweetness of the milk chocolate and provide a more complex flavor.
These ingredients combine to create the layered masterpiece that is Mary Berry’s Caramel Square: a crunchy, buttery base topped with gooey caramel and finished with a smooth chocolate coating.
Equipment Needed
The equipment required for this recipe is simple, and most of it can be found in any home kitchen. Here’s a list of the essentials:
- Baking tin (20cm x 20cm) – A square tin is typically used for caramel squares, and a 20cm x 20cm (8 x 8 inches) size works best. The square shape helps ensure even slicing once the treat is set and cool.
- Baking parchment or greaseproof paper – To prevent the caramel squares from sticking to the tin, line the base and sides of the tin with baking parchment. This also makes it much easier to lift the squares out once they’re ready to be cut.
- Mixing bowls – You’ll need one for the shortbread dough and another for the caramel mixture. It’s helpful to use heatproof bowls when making the caramel, as you’ll need to melt the ingredients.
- Saucepan – For melting the butter, condensed milk, and golden syrup together to make the caramel layer, a medium-sized saucepan is ideal.
- Wooden spoon or spatula – To stir the shortbread dough and the caramel, a sturdy spoon or spatula is essential to avoid lumps and ensure the ingredients are well combined.
- Electric hand mixer (optional) – While mixing the shortbread dough can easily be done by hand, an electric hand mixer will save time and effort, especially if you’re looking for a quick and efficient way to combine the ingredients.
- Heatproof spatula or palette knife – A heatproof spatula is useful for spreading the caramel evenly across the shortbread base and smoothing the chocolate topping once it’s poured over the caramel.
- Sharp knife – After the caramel squares have set, you’ll need a sharp knife to cut them into neat squares or rectangles. A serrated knife works particularly well to avoid squishing the soft layers.
How To Make Mary Berry’s Caramel Square
Now that we have the ingredients and equipment ready, let’s dive into the steps involved in creating these delightful caramel squares:
Step 1: Preparing The Shortbread Base
- Preheat the oven to 160°C (140°C fan)/325°F/Gas mark 3.
- Prepare your baking tin by lining it with parchment paper. Make sure to line both the base and sides to prevent the caramel squares from sticking later on.
- In a large bowl, combine the plain flour, cornflour, and caster sugar. Stir until evenly mixed.
- Add the butter to the dry ingredients. You can either cut it into cubes or grate it for quicker incorporation into the flour mixture. Use your fingers or a pastry cutter to rub the butter into the flour until the mixture resembles breadcrumbs.
- Once the mixture reaches a crumbly texture, press it into the bottom of the prepared tin, ensuring an even layer. You can use the back of a spoon to compact it slightly.
- Bake the shortbread base for 15-20 minutes or until it’s golden brown. Allow it to cool completely in the tin before moving on to the next step.
Step 2: Making The Caramel Layer
- In a saucepan, combine the unsalted butter, sweetened condensed milk, and golden syrup. Place the pan over low heat.
- Stir continuously until the butter has melted and the mixture is smooth and well combined.
- Increase the heat to medium and bring the mixture to a gentle boil. Allow it to bubble gently for 4-5 minutes, stirring often to prevent it from burning.
- Once the caramel has thickened slightly and developed a golden color, pour it over the cooled shortbread base. Use a spatula to spread it evenly across the surface.
- Set the tin aside and let the caramel layer cool for at least 20 minutes. If you’re in a hurry, you can place it in the fridge to speed up the cooling process.
Step 3: Adding The Chocolate Topping
- While the caramel cools, melt the milk chocolate and dark chocolate (if using). You can do this over a double boiler or by microwaving the chocolate in short bursts, stirring between each interval to prevent it from burning.
- Once the chocolate has melted and is smooth, pour it over the caramel layer. Use a spatula to spread it evenly, ensuring the chocolate completely covers the caramel.
- Allow the chocolate to set at room temperature or in the fridge for around 30 minutes or until it’s firm.
Step 4: Cutting The Squares
- Once everything is set and firm, cut the caramel squares into neat portions using a sharp knife. If you want to avoid cracking the chocolate, run the knife under hot water and wipe it dry before slicing.
- Serve immediately or store in an airtight container for up to a week.
Expert Tips
- Perfect Shortbread – To achieve a crumbly, melt-in-the-mouth texture for your shortbread, don’t overwork the dough. Once the butter is incorporated, press it gently into the tin to avoid compacting the dough too much.
- Be Patient with the Caramel – The caramel requires constant attention while boiling. If you overheat it or let it burn, it may develop a grainy texture. Stir frequently and don’t rush the process.
- Chill Between Layers – Allow each layer to cool before adding the next. This ensures the layers set properly and prevents the chocolate from mixing with the caramel.
- Use Quality Chocolate – The chocolate is the final flavor layer in this recipe, so using high-quality milk chocolate can really elevate the taste. Consider using a chocolate with a cocoa content around 35% for the perfect balance of sweetness and creaminess.
- Cut with Care – Caramel squares can be a bit sticky when sliced, especially if the caramel is not fully set. To get clean cuts, use a hot knife and wipe it between cuts to keep things neat.
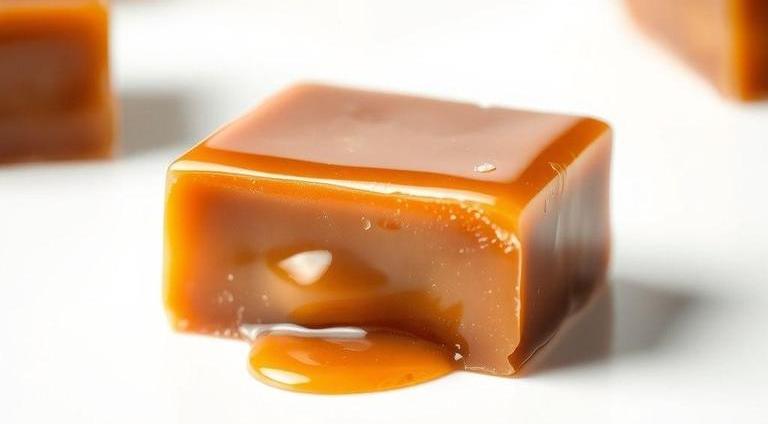
Mary Berry’s Caramel Squares are the perfect treat for anyone who loves a combination of buttery shortbread, sweet caramel, and smooth chocolate. This indulgent dessert is relatively simple to make but is sure to impress with its rich, layered textures and flavors. By following the steps carefully and using high-quality ingredients, you’ll be rewarded with a tray of perfectly balanced, melt-in-the-mouth squares that everyone will adore.
Whether you’re baking for a family gathering, a celebration, or just because you want something sweet, these caramel squares are a guaranteed crowd-pleaser. And with expert tips to ensure every layer is flawless, you’ll be able to enjoy Mary Berry’s famous recipe time and time again!
Easy Recipe Variations For Mary Berry’s Caramel Square
Mary Berry’s Caramel Square is a classic indulgence, with layers of buttery biscuit, sweet caramel, and smooth chocolate, offering a perfect balance of textures and flavors. However, like all beloved recipes, it can easily be adapted to suit different tastes or dietary preferences. Here are some simple and delightful variations to try:
-
Nutty Caramel Squares
Adding nuts to the recipe brings an extra layer of flavor and crunch. Chopped hazelnuts, walnuts, or pecans can be sprinkled on top of the caramel layer or folded into the biscuit base before setting it.
Nuts offer a lovely contrast to the smooth caramel and rich chocolate, providing depth and texture. For an added touch, toast the nuts lightly to bring out their natural oils and flavor.
-
Vegan Caramel Square
To cater to those following a vegan diet, swap out dairy products with plant-based alternatives. Use dairy-free butter or margarine in the biscuit base, and substitute traditional condensed milk with a coconut milk version or any other plant-based sweetened condensed milk.
Choose vegan chocolate to replace the milk or dark chocolate topping. This variation doesn’t compromise on flavor and is perfect for those avoiding animal products.
-
Salted Caramel Twist
For fans of sweet-and-salty combos, you can add a pinch of sea salt to the caramel layer. The salt enhances the richness of the caramel and complements the sweetness of the chocolate topping. You can even sprinkle a little sea salt on top of the chocolate before it sets to create a lovely finish and emphasize the balance between the salty and sweet notes.
-
Flavored Biscuit Base
While digestives are traditionally used for the base, you can experiment with different biscuits for a unique twist. Try using ginger biscuits for a spicy warmth that pairs wonderfully with the caramel, or chocolate digestives for a deeper, cocoa-infused flavor. Alternatively, a shortbread biscuit base could offer a buttery richness that contrasts nicely with the caramel.
-
Fruit-Filled Caramel Square
Adding fruit, such as dried cranberries, raisins, or even fresh berries, into the caramel layer can bring a refreshing, tart contrast to the otherwise sweet treat. The acidity from the fruit balances the sugary caramel and chocolate, making each bite even more delightful.
-
Coffee-Caramel Fusion
For coffee lovers, infuse the caramel with a small amount of instant coffee or espresso powder. The bitterness of coffee complements the sweetness of the caramel, creating a sophisticated dessert with a deep, rich flavor profile. This variation would be particularly great served with a hot cup of coffee or espresso.
These variations are simple yet effective ways to customize Mary Berry’s Caramel Square to suit your mood, dietary needs, or flavor preferences. The beauty of this recipe is its versatility – it’s easy to get creative and try out new twists without losing the essence of the original.
Best Practices To Store Leftovers
When you have leftover Caramel Squares (if you’re lucky enough to have any!), it’s important to store them properly to maintain their texture and freshness. Here are the best practices to ensure your treats stay just as delicious:
-
Cool Completely Before Storing
It’s essential to let the Caramel Squares cool completely after cutting them. Storing them while still warm could cause condensation, leading to soggy layers or a sticky mess. Let them rest at room temperature for a few hours to ensure they’re firm before wrapping them up.
-
Use Airtight Containers
The best way to store Caramel Squares is in an airtight container. This helps to keep them fresh and prevents them from absorbing unwanted moisture or odors from the surrounding environment. If you have a lot of squares, you can stack them, but it’s a good idea to separate each layer with parchment paper to prevent the caramel from sticking to the next layer.
-
Refrigeration for Longevity
Although Caramel Squares can be kept at room temperature for a few days, refrigerating them will prolong their shelf life. Cold temperatures help maintain the firmness of the caramel and the chocolate, especially in warm weather.
However, be mindful that refrigeration may cause the chocolate to lose its glossy sheen and can make the biscuit base slightly firmer. Allow the squares to come to room temperature before serving to restore their original texture.
-
Freezing for Extended Storage
If you want to store Caramel Squares for an extended period, freezing them is a great option. Place the squares in a single layer on a baking sheet and freeze them for an hour to prevent them from sticking together.
After freezing, transfer the squares into a sealed freezer bag or airtight container. When you’re ready to enjoy them again, simply take them out of the freezer and let them thaw at room temperature. Freezing does not affect the taste, but the texture may change slightly, especially in the biscuit base.
-
Shelf Life
Caramel Squares will last for up to a week when stored at room temperature in an airtight container. If refrigerated, they can last up to two weeks. In the freezer, they can stay fresh for up to three months, though it’s best to consume them within a couple of months for optimal taste and texture.
By following these storage tips, you can ensure your Caramel Squares remain as delightful and fresh as the day they were made, ready to be enjoyed whenever a sweet craving strikes.
What Goes Well With Caramel Square
Caramel Squares are already a rich and indulgent treat, but they can be paired with a variety of accompaniments to elevate the experience even further. Here are a few suggestions that complement the caramel and chocolate flavors perfectly:
-
A Cup of Tea
There’s no better pairing for a Caramel Square than a classic cup of tea. The slight bitterness of black tea, such as Earl Grey or English Breakfast, balances the sweetness of the dessert.
The tannins in tea help cut through the richness of the caramel, offering a lovely contrast. If you prefer herbal teas, chamomile or mint tea offers a soothing pairing that doesn’t overwhelm the flavors of the square.
-
Coffee or Espresso
The deep, bold flavors of coffee are a natural match for the sweet and buttery layers of the Caramel Square. The slight bitterness of espresso or a cappuccino provides a nice contrast, making each bite of the caramel dessert even more enjoyable. For an extra indulgence, consider adding whipped cream or a sprinkle of cocoa powder to your coffee.
-
Fresh Berries
The tartness of fresh berries, such as raspberries, strawberries, or blackberries, is a delightful contrast to the rich caramel. The acidity and freshness of the fruit cleanse the palate between bites, making each mouthful of the Caramel Square feel like a new experience. For a more luxurious touch, you could drizzle a bit of berry coulis over the square.
-
Ice Cream or Whipped Cream
A scoop of vanilla ice cream or a dollop of whipped cream is an easy and irresistible pairing for Caramel Squares. The cool, creamy texture of the ice cream contrasts beautifully with the richness of the caramel and chocolate. Whipped cream, lightly sweetened and flavored with a hint of vanilla or even cinnamon, can also complement the flavors and add a light, airy texture.
-
Chocolate or Nut Liqueurs
For a more decadent pairing, consider a glass of chocolate or nut liqueur. Baileys Irish Cream, Amaretto, or Frangelico pair wonderfully with caramel desserts, enhancing the indulgent sweetness of the square. These liqueurs add complexity and warmth, making for a luxurious after-dinner treat.
By thoughtfully pairing Caramel Squares with these options, you can create a well-rounded dessert experience that satisfies all your taste buds.
Conclusion
Mary Berry’s Caramel Square is a timeless dessert that offers layers of sweetness, buttery richness, and smooth chocolatey goodness. Its versatility allows for a wide range of variations, from nutty and vegan alternatives to salty twists and fruit-filled creations.
Storing leftovers is simple when you follow the best practices of cooling, airtight containers, and refrigeration or freezing for longer shelf life. And when it comes to pairing, there are countless options, from the comforting warmth of tea or coffee to the refreshing contrast of fresh berries and the indulgence of ice cream.
Whether you’re baking them for a special occasion or simply indulging in a sweet treat, Caramel Squares are sure to be a crowd-pleaser. With a little creativity and thoughtful pairing, you can elevate this classic dessert and enjoy it in new and exciting ways.
FAQs
What Ingredients Do I Need For Mary Berry’s Caramel Square Recipe?
For Mary Berry’s caramel squares, you’ll need digestive biscuits, butter, caster sugar, golden syrup, condensed milk, and a pinch of salt for the caramel filling. The base uses the digestive biscuits and butter.
Can I Use A Different Type Of Biscuit For The Base?
While digestive biscuits are traditionally used in Mary Berry’s recipe, you can substitute them with other types of plain biscuits such as shortbread or even graham crackers for a slightly different flavor.
How Long Do Mary Berry’s Caramel Squares Take To Make?
The preparation time for Mary Berry’s caramel squares is about 20 minutes, with an additional 2-3 hours to allow them to chill and set in the fridge. So, overall, they take around 3 hours.
Can I Make The Caramel Squares Ahead Of Time?
Yes, the caramel squares can be made ahead of time and stored in the fridge for up to a week. Just make sure to store them in an airtight container to keep them fresh.
How Do I Know When The Caramel Has Reached The Right Consistency?
The caramel filling should be thick enough to coat the back of a spoon. When it starts to bubble gently and darken in color, that’s a sign it’s close to being ready. Keep stirring to prevent it from burning.
Can I Add Any Extras To The Caramel Squares?
You can definitely add extras like chopped nuts, such as pecans or hazelnuts, or a sprinkle of sea salt on top for a sweet-salty flavor. Some people also drizzle chocolate over the top for an extra indulgent touch.
Why Did My Caramel Squares Turn Out Too Soft Or Gooey?
If your caramel squares turned out too soft or gooey, it’s likely that the caramel filling wasn’t cooked long enough to set properly. Make sure the caramel is bubbling gently for a few minutes before removing it from the heat. Let them chill in the fridge to firm up.
Do I Need To Use Golden Syrup For This Recipe?
Yes, golden syrup is an important ingredient in Mary Berry’s caramel squares as it adds sweetness and helps the caramel achieve its smooth texture. If you don’t have golden syrup, you can try using light corn syrup, though it may slightly alter the flavor.
Can I Freeze Mary Berry’s Caramel Squares?
Yes, you can freeze the caramel squares. To freeze, wrap them tightly in plastic wrap and then store them in a freezer-safe container.
They can be frozen for up to 3 months. Just allow them to thaw in the fridge before serving.
How Do I Cut The Caramel Squares Into Neat Pieces?
To cut the caramel squares neatly, ensure they are fully chilled before slicing. Use a sharp knife and run it under warm water before cutting each piece. This helps prevent the caramel from sticking to the knife and creates cleaner cuts.
![Mary Berry Butternut Squash Soup Recipe [Tips & Tricks]](https://famousyummyrecipes.com/wp-content/uploads/2025/03/butternut-squash-soup.jpg)
![Mary Berry Fresh Cream Sponge Cake Recipe [Tips & Tricks]](https://famousyummyrecipes.com/wp-content/uploads/2025/03/fresh-cream-sponge-cake.jpg)
![Mary Berry Mushroom And Leek Soup Recipe [Tips & Tricks]](https://famousyummyrecipes.com/wp-content/uploads/2025/03/mushroom-and-leek-soup.jpg)
![Mary Berry Sweet Chilli Prawn Canapes Recipe [Tips & Tricks]](https://famousyummyrecipes.com/wp-content/uploads/2025/03/sweet-chilli-prawn-canapes.jpg)
![Mary Berry Madeleines Recipe [Tips & Tricks]](https://famousyummyrecipes.com/wp-content/uploads/2025/03/madeleines.jpg)
![Mary Berry Chicken Schnitzel Recipe [Tips & Tricks]](https://famousyummyrecipes.com/wp-content/uploads/2025/03/chicken-schnitzel.jpg)