
Mary Berry Iced Fairy Cakes Recipe [Tips & Tricks]
Note: This page contains affiliate links.
As an Amazon Associate, I earn from qualifying purchases when you click on the link, but you are not charged extra.
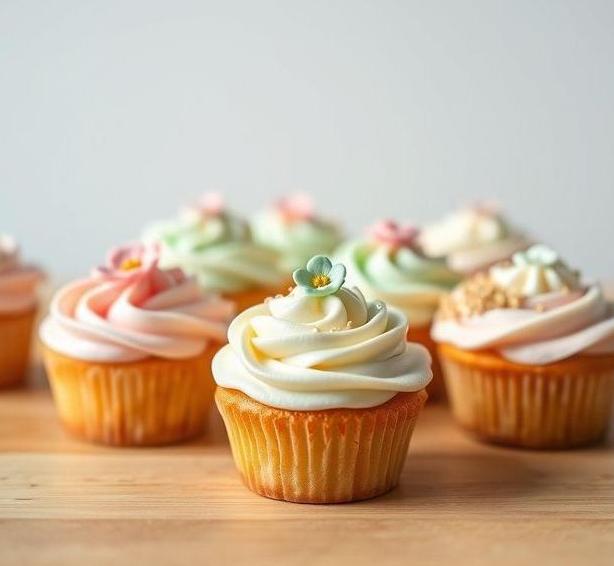
If you’re looking to bake something that’s both simple and delicious, Mary Berry’s iced fairy cakes are the perfect choice!
These little treats are the ideal combination of light, fluffy cake and sweet, tangy icing, making them irresistible to both kids and adults alike. Mary Berry’s recipe is easy to follow and guarantees a delightful result every time, whether you’re a seasoned baker or a beginner in the kitchen. Plus, they’re perfect for any occasion – from afternoon tea to birthday parties – so why not give this classic recipe a try and impress your friends and family with these adorable, scrumptious cakes?
Mary Berry Iced Fairy Cakes Recipe
Ingredients Needed
To make Mary Berry’s Iced Fairy Cakes, you’ll need a simple yet delightful collection of ingredients, most of which you probably already have in your pantry. The simplicity of these ingredients makes the recipe accessible for bakers of all skill levels, while still delivering a wonderfully indulgent treat. Here’s a detailed list of what you’ll need:
-
Butter (unsalted) – 4oz (113g): The butter adds a rich, creamy texture to the cake batter. Using unsalted butter is important because it gives you more control over the flavor, ensuring that the sweetness of the cake isn’t overshadowed by salt.
-
Caster Sugar – 4oz (113g): Caster sugar is finer than regular granulated sugar, which allows it to dissolve easily into the butter, ensuring a smooth, light cake texture. The sweetness of the sugar is a fundamental base for balancing the other flavors.
-
Self-Raising Flour – 4oz (113g): This is the key ingredient that will give your fairy cakes a lovely, light rise. Self-raising flour already contains a leavening agent (baking powder), so it’s one less thing to worry about when mixing your batter.
-
Eggs – 2 large: Eggs are the binding agents in the cake, helping to hold everything together while also providing structure and moisture. They also contribute to the rich flavor of the cake.
-
Vanilla Extract – 1 teaspoon: A classic flavor enhancer that pairs beautifully with the sweetness of the cake and the lightness of the icing. The vanilla adds depth and warmth to the overall taste.
-
Milk – 2 tablespoons: Milk adds moisture to the batter, ensuring that the cake has the perfect crumb texture. It also helps adjust the consistency if the batter feels too thick.
-
Icing Sugar – 5oz (140g): This is the main ingredient for the icing. It’s a finely ground sugar that dissolves quickly, giving the icing a smooth, velvety finish that coats the fairy cakes beautifully.
-
Food Coloring (optional): This is purely optional, but if you want to give your fairy cakes a bit of flair, adding a drop or two of food coloring can make them more vibrant and festive.
-
Decorations – Hundreds and thousands or sprinkles: These tiny, colorful sprinkles are a classic addition that brings joy and a pop of color to the delicate, dainty fairy cakes. They also add a bit of crunch that contrasts nicely with the soft cake and smooth icing.
Equipment Needed
To create Mary Berry’s Iced Fairy Cakes, you don’t need any complex or hard-to-find equipment. The tools required are simple but essential for achieving the perfect result. Here’s what you’ll need:
-
Mixing Bowl: A large mixing bowl is necessary for combining all of the ingredients together. It should be big enough to hold the flour, sugar, eggs, and butter without spilling over.
-
Electric Mixer or Whisk: While you can mix the ingredients by hand using a whisk, an electric hand mixer or stand mixer makes the job much easier and quicker, ensuring that the butter and sugar are light and fluffy before adding the other ingredients.
-
Cupcake Tin or Fairy Cake Tray: A standard 12-hole muffin tin works perfectly for making fairy cakes. If you want smaller, more delicate cakes, you can use a fairy cake tray with mini cupcake wells. Be sure to line the tray with paper cupcake liners for easy removal after baking.
-
Spoons and a Spatula: These are essential for transferring the cake batter into the tin. A teaspoon or tablespoon works great for filling the cupcake liners evenly. A spatula will help scrape the batter out of the mixing bowl and into the cups.
-
Cooling Rack: Once the cakes are baked, they need to cool down before icing them. A cooling rack allows air to circulate around the cakes, preventing them from becoming soggy on the bottom.
-
Sieve (for icing sugar): A sieve helps to prevent any lumps in your icing sugar and ensures that the icing is smooth when it’s spread on top of the cakes.
-
Knife or Offset Spatula: For spreading the icing evenly over each fairy cake, a butter knife or offset spatula works well. It allows you to control the amount of icing and gives a nice finish.
-
Small Bowl (for icing): A small bowl is useful for mixing your icing sugar with milk and any desired food coloring. It helps to get the right consistency for easy spreading.
How To Make Mary Berry’s Iced Fairy Cakes
Making Mary Berry’s Iced Fairy Cakes is a simple yet incredibly rewarding process. The steps are straightforward, and if followed carefully, they will result in perfectly fluffy, delicious fairy cakes that are ideal for any occasion. Here’s a step-by-step guide:
-
Preheat the Oven: Start by preheating your oven to 180°C (350°F), or 160°C (320°F) if you’re using a fan oven. This ensures that the cakes bake evenly.
-
Prepare the Tin: Line a 12-hole fairy cake tray or muffin tin with cupcake liners. This will make it easier to remove the cakes after baking and keep them in good shape.
-
Mix the Butter and Sugar: In a large mixing bowl, beat the softened butter and caster sugar together using an electric mixer on medium speed until the mixture becomes light and fluffy. This process incorporates air into the batter, which is key to getting soft, airy cakes.
-
Add the Eggs: Crack the eggs into the butter and sugar mixture one at a time, beating well after each addition. This helps prevent the mixture from curdling and ensures everything is evenly incorporated.
-
Sift in the Flour: Sift the self-raising flour into the bowl to avoid lumps. Carefully fold it into the wet ingredients using a spatula or a large metal spoon. Be gentle to maintain the lightness of the batter.
-
Add the Milk and Vanilla: Stir in the milk and vanilla extract. This will loosen the batter to the right consistency, making it easier to spoon into the cake tin.
-
Fill the Cake Tin: Using a spoon, carefully divide the batter evenly between the cupcake liners, filling each one about two-thirds full. This allows space for the cakes to rise without overflowing.
-
Bake the Cakes: Place the tin in the preheated oven and bake for about 12-15 minutes, or until the cakes are golden brown on top and a skewer inserted into the center comes out clean.
-
Cool the Cakes: Once baked, remove the cakes from the oven and allow them to cool in the tin for a few minutes before transferring them to a cooling rack. They should cool completely before icing.
-
Make the Icing: While the cakes are cooling, sift the icing sugar into a small bowl. Add a tablespoon or two of milk, mixing until you achieve a smooth, glossy icing. If you want to color your icing, now is the time to add a drop of food coloring.
-
Ice the Cakes: Once the cakes are fully cooled, spread a generous amount of icing onto each cake using a knife or spatula. Aim for an even layer that covers the entire top.
-
Decorate: Finally, decorate your fairy cakes with hundreds and thousands or any other sprinkles of your choice. This adds a fun, festive touch and makes the cakes even more delightful.
Expert Tips
- Room Temperature Butter: Make sure your butter is at room temperature before starting the recipe. This will ensure that it mixes easily with the sugar, creating a smooth, light batter.
- Don’t Overmix: When adding the flour to the wet ingredients, mix just until incorporated. Overmixing can result in dense, heavy cakes. The key is to keep the batter light and airy.
- Check the Cakes Early: Ovens vary, so start checking your cakes a minute or two before the recommended baking time. If they’re golden and a skewer comes out clean, they’re done.
- Add a Dash of Lemon: For a fresh twist, you can add a teaspoon of lemon zest to the batter. This will give your fairy cakes a lovely citrusy fragrance that pairs beautifully with the sweet icing.
- Use a Thick Icing: For a glossy, firm finish, make sure your icing is slightly thick. If it’s too runny, it might drip off the cakes, leaving them unevenly covered.
Mary Berry’s Iced Fairy Cakes are a timeless treat, perfect for afternoon tea, parties, or simply as a sweet indulgence on a lazy day. With their delicate, light texture and vibrant icing, these fairy cakes capture the essence of classic British baking.
The combination of simple ingredients and straightforward steps makes this recipe an ideal choice for beginners and seasoned bakers alike. Whether you’re making them for a special occasion or just because, the result will always be a delicious, charming batch of cakes that are as fun to make as they are to eat.
Easy Recipe Variations For Mary Berry’s Iced Fairy Cakes
Mary Berry’s Iced Fairy Cakes are a delightful treat that combines the sweetness of a light, fluffy sponge with the tang of icing on top. But the beauty of this classic recipe is in its versatility.
While Mary Berry’s version is delicious in its own right, there are a multitude of ways to tweak and experiment with the ingredients to suit different preferences or make use of what’s on hand. Here are a few easy variations:.
1. Flavored Sponges:
One simple way to switch things up is by adding different flavors to the cake batter itself. A dash of lemon zest, vanilla extract, or almond essence can completely transform the base of the fairy cakes. For a more decadent twist, try incorporating cocoa powder to create a chocolate sponge, or even a swirl of strawberry jam to give the cakes a fruity essence.
2. Infused Icing:
While Mary Berry’s classic icing is a beautiful smooth fondant or buttercream, you can experiment with infused flavors. Consider adding a few drops of rose water or orange blossom water to the icing for a subtle floral note.
If you’re in the mood for something a little bolder, a hint of espresso or a touch of cinnamon could give the icing a spicy richness. For a vibrant, summery touch, you could even mix in some fresh raspberry puree into the icing for a fruity, pink topping.
3. Fruit and Nuts Toppings:
If you love adding extra textures and flavors to your fairy cakes, try embellishing the iced tops with finely chopped fruits, nuts, or even edible flowers. Crushed pistachios, raspberries, or even a sprinkle of desiccated coconut can add an extra layer of flavor and visual appeal. For a more indulgent treat, drizzle the cakes with melted chocolate and top with crushed caramelized nuts.
4. Dairy-Free or Vegan Variations:
For those who are avoiding dairy or looking for a plant-based version, Mary Berry’s Iced Fairy Cakes can easily be adapted. Use a dairy-free margarine or coconut oil in place of butter, and substitute almond or oat milk in place of regular milk. Vegan buttercream or a simple icing sugar and water mixture can create a suitable non-dairy frosting, while keeping the texture just as light and airy as the original.
5. Miniature Cupcake Twist:
If you’re craving something more bite-sized, consider creating mini versions of these fairy cakes, perfect for snacking or serving at parties. The recipe is perfect for mini cupcake liners, and the smaller size provides an opportunity for more intricate decoration, from multi-layered icing to colorful sprinkles or glitter. Mini versions of these cakes are always a hit at gatherings, especially with kids.
Best Practices To Store Leftovers
When it comes to storing leftover Mary Berry’s Iced Fairy Cakes, the key is maintaining their moisture and freshness while ensuring the icing doesn’t become soggy or lose its beautiful texture. Here are the best practices for keeping these delightful cakes at their best:
1. Room Temperature Storage:
If you plan to eat the leftover fairy cakes within a couple of days, storing them at room temperature is perfectly fine. Place them in an airtight container, layering a sheet of parchment paper between cakes if necessary to avoid sticking. Keep them in a cool, dry place, away from direct sunlight or heat, which could cause the icing to melt.
2. Refrigeration for Longer Freshness:
If you need to store the cakes for more than two days, refrigeration is the better option, but be aware that the icing can harden in the fridge. To avoid this, you can cover the cakes loosely with cling film or place them in an airtight container with a small piece of kitchen towel to absorb any moisture. This will help preserve the texture of the cakes and prevent them from becoming overly dry.
3. Freezing for Extended Storage:
To store your fairy cakes for a longer period, freezing is the best option. Start by freezing the cakes without the icing on them.
Place them on a baking tray in a single layer, ensuring they aren’t touching. Once frozen, transfer the cakes to a zip-lock freezer bag or an airtight container.
When you’re ready to enjoy them, simply defrost the cakes at room temperature, then ice them fresh before serving. This method preserves the freshness of the sponge and allows you to customize the icing upon thawing.
4. Avoid Storing Icing Separately:
It’s generally not recommended to store icing separately, as the texture can change once frozen or refrigerated. If you’re planning to freeze your cakes, it’s best to apply the icing after thawing, ensuring it’s fresh and smooth when it’s time to serve.
What Goes Well With Iced Fairy Cakes
Iced Fairy Cakes are wonderfully versatile and can be paired with a variety of beverages or accompaniments to elevate your tea time, party spread, or afternoon snack. Here are some great pairings:
1. Tea:
Mary Berry’s Iced Fairy Cakes were made for pairing with a cup of tea. A classic English breakfast or Earl Grey tea offers a robust contrast to the sweetness of the cakes, while a delicate Darjeeling or green tea complements the lightness of the sponge and icing. For those looking for a bit of flavor, try pairing them with a fruity herbal tea, like chamomile, raspberry, or a citrus blend, which can enhance the cake’s flavor profile.
2. Fresh Fruit:
The light sweetness of fairy cakes pairs beautifully with fresh fruit. Berries, in particular, complement the soft, fluffy texture of the cakes-think strawberries, raspberries, or blueberries. You could even serve the fairy cakes with a fruit salad on the side for a fresh, vibrant contrast to the sugary icing.
3. Cream or Custard:
For a decadent treat, serve Iced Fairy Cakes alongside some freshly whipped cream or a scoop of custard. The creamy richness will balance the sweetness of the cakes while adding a luxurious element to the experience. This combination is particularly wonderful if you’re serving the fairy cakes as part of a larger dessert spread.
4. Ice Cream:
Pairing Iced Fairy Cakes with a scoop of vanilla ice cream or a tangy sorbet makes for a delightful dessert. The cold, creamy texture of the ice cream contrasts with the airy sponge and sugary icing, creating a refreshing and indulgent pairing. Vanilla bean, chocolate, or even a fruity sorbet could be the perfect complement to the fairy cakes, depending on your flavor preferences.
5. Prosecco or Sparkling Wine:
For a more celebratory occasion, Iced Fairy Cakes go wonderfully with a glass of chilled prosecco or sparkling wine. The light, bubbly nature of the drink enhances the airy texture of the cakes and adds a touch of effervescence to your tea party or gathering.
Conclusion
Mary Berry’s Iced Fairy Cakes are a timeless and delightful treat that epitomizes the charm of classic British baking. Their light, fluffy texture and sweet, smooth icing make them an irresistible choice for any occasion, from an afternoon tea to a birthday celebration.
The beauty of this recipe lies not only in its simplicity but in its versatility. With just a few tweaks, you can transform the flavor profile of the cakes to suit your mood or dietary preferences.
Storing leftovers is easy, whether you’re keeping them at room temperature for a short while, refrigerating them for a few days, or freezing them for longer periods. And no matter how you choose to store or serve them, they’re best enjoyed with a complementary beverage or accompaniment, whether it’s a cup of tea, a scoop of ice cream, or a glass of bubbly.
Ultimately, these fairy cakes are a perfect canvas for creativity, whether you decide to stick to the classic recipe or experiment with flavor and decoration. Mary Berry’s Iced Fairy Cakes will always be a crowd-pleaser, a charming dessert that is as delightful to look at as it is to eat.
FAQs
What Are Mary Berry’s Iced Fairy Cakes?
Mary Berry’s iced fairy cakes are light, fluffy, and delicate sponge cakes that are topped with a sweet, colorful icing. They are a classic British treat often served as a snack or at afternoon tea. These fairy cakes are smaller than traditional cupcakes, typically made with a light sponge base and finished with a simple buttercream icing or glace icing.
What Ingredients Are Needed For Mary Berry’s Iced Fairy Cakes?
The ingredients for Mary Berry’s iced fairy cakes include self-raising flour, caster sugar, unsalted butter, eggs, vanilla extract, milk, and icing sugar for the icing. You will also need food coloring or sprinkles to decorate the cakes, if desired.
How Do I Make The Sponge For Mary Berry’s Iced Fairy Cakes?
To make the sponge, begin by creaming together the butter and caster sugar until light and fluffy. Then, add the eggs one at a time, mixing well after each addition.
Gradually fold in the self-raising flour and a splash of milk until the mixture is smooth and well combined. Spoon the mixture into cupcake cases and bake at 190°C (375°F) for around 12-15 minutes, or until a skewer comes out clean.
How Can I Make The Icing For Mary Berry’s Iced Fairy Cakes?
The icing for Mary Berry’s iced fairy cakes is typically made using icing sugar and water. For glace icing, mix the icing sugar with a small amount of water until it reaches a thick, but pourable consistency. If you prefer buttercream icing, you can use butter, icing sugar, and a splash of vanilla extract to create a smooth and fluffy topping.
Can I Make Mary Berry’s Iced Fairy Cakes Without Self-raising Flour?
Yes, you can substitute self-raising flour with plain flour and add a teaspoon of baking powder for every 150g of plain flour. This will help give the cakes the lift they need for a light and airy texture.
How Long Do Mary Berry’s Iced Fairy Cakes Last?
Mary Berry’s iced fairy cakes are best enjoyed within 2-3 days of baking, as the sponge tends to dry out over time. They can be stored in an airtight container at room temperature, but avoid refrigerating them as this can affect the texture.
Can I Freeze Mary Berry’s Iced Fairy Cakes?
Yes, you can freeze the cakes before they are iced. Once baked and cooled, wrap the fairy cakes individually in plastic wrap and place them in an airtight container or freezer bag.
They can be frozen for up to 3 months. To enjoy them, simply defrost at room temperature and ice when ready to serve.
What Is The Best Way To Decorate Mary Berry’s Iced Fairy Cakes?
For decoration, you can drizzle a simple glace icing over the top and add colorful sprinkles, edible glitter, or small decorations like candied fruits or chocolate chips. If you’re using buttercream icing, you can pipe it onto the cakes and decorate with any toppings of your choice.
Can I Make Mary Berry’s Iced Fairy Cakes Gluten-free?
Yes, you can make Mary Berry’s iced fairy cakes gluten-free by substituting the self-raising flour with a gluten-free flour blend and ensuring your baking powder is gluten-free. Be sure to check the other ingredients, such as the butter and icing sugar, to confirm they are suitable for a gluten-free diet.
What Is The Secret To A Light And Fluffy Sponge In Mary Berry’s Iced Fairy Cakes?
The key to achieving a light and fluffy sponge in Mary Berry’s iced fairy cakes is to cream the butter and sugar well until the mixture is pale and fluffy. Also, avoid over-mixing the batter once the flour is added, as this can make the cakes dense. Make sure to fold the flour in gently to keep the air in the mixture.
![Mary Berry Fork Biscuits Recipe [Tips & Tricks]](https://famousyummyrecipes.com/wp-content/uploads/2025/03/fork-biscuits.jpg)
![Mary Berry Celebration Chocolate Mousse Cake Recipe [Tips & Tricks]](https://famousyummyrecipes.com/wp-content/uploads/2025/03/celebration-chocolate-mousse-cake.jpg)
![Mary Berry Palmiers Recipe [Tips & Tricks]](https://famousyummyrecipes.com/wp-content/uploads/2025/03/palmiers.jpg)
![Mary Berry Tear And Share Cheese And Herb Rolls Recipe [Tips & Tricks]](https://famousyummyrecipes.com/wp-content/uploads/2025/03/tear-and-share-cheese-and-herb-rolls.jpg)
![Mary Berry Honey Glazed Parsnip Soup Recipe [Tips & Tricks]](https://famousyummyrecipes.com/wp-content/uploads/2025/03/honey-glazed-parsnip-soup.jpg)
![Mary Berry Coconut Pyramids Recipe [Tips & Tricks]](https://famousyummyrecipes.com/wp-content/uploads/2025/03/coconut-pyramids.jpg)