
Mary Berry Danish Pastry Recipe [Tips & Tricks]
Note: This page contains affiliate links.
As an Amazon Associate, I earn from qualifying purchases when you click on the link, but you are not charged extra.
If you’re a fan of deliciously flaky, buttery pastries that melt in your mouth, you absolutely have to try Mary Berry’s Danish pastry recipe!
Mary Berry is a baking legend, and her take on this classic treat combines simplicity with unbeatable flavor. Her recipe ensures that the dough rises to perfection, resulting in a golden, crisp exterior with a soft, airy inside. Plus, the sweet fillings-whether it’s fruit, cream cheese, or chocolate-make each bite a heavenly experience. Whether you’re a seasoned baker or just starting out, this recipe will impress anyone lucky enough to sample it!
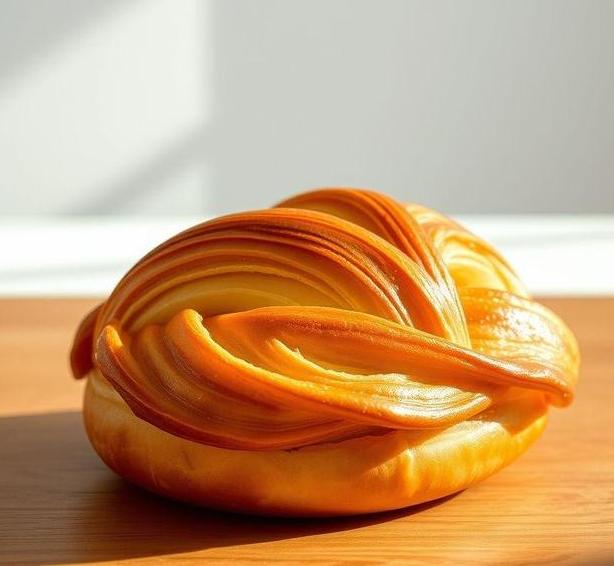
Mary Berry Danish Pastry Recipe
Ingredients Needed
To make Mary Berry’s Danish Pastry, you’ll need a variety of ingredients that combine to create a tender, flaky pastry. Here’s a comprehensive list:
-
Plain Flour – Flour is the base of the pastry dough. It provides structure and texture. Plain flour is ideal for Danish pastries, as it has just the right amount of gluten to achieve the tender, flaky layers without becoming too tough.
-
Butter – Butter is key to making the pastry rich and flaky. You’ll need cold, unsalted butter to create the laminated layers in the dough. The butter helps the dough rise and gives it that delicious, buttery flavor we associate with Danish pastries.
-
Milk – Milk adds moisture to the dough and helps activate the yeast, allowing the pastry to rise and become airy and light. Whole milk is typically used for a richer texture and flavor.
-
Sugar – A little sugar is essential not only to sweeten the dough but also to aid in browning the pastry during baking. It helps create that golden, slightly crisp finish.
-
Yeast – Yeast is a critical ingredient for creating the light, fluffy texture of Danish pastries. You’ll need active dry yeast or instant yeast to ensure proper leavening.
-
Salt – A pinch of salt is important for balancing the flavors in the dough, enhancing the sweetness and overall taste.
-
Eggs – Eggs are crucial for binding the dough together. They also contribute to the overall texture of the pastry, making it tender and slightly rich.
-
Water – You’ll need cold water to bring the dough together. The colder the water, the better the dough will handle the lamination process.
-
Filling (optional) – Mary Berry’s Danish pastry recipes often include a filling of your choice, such as:
- Fruit preserves (raspberry, apricot, or strawberry) for a fruity touch.
- Marzipan for an almondy filling.
- Cream cheese or custard for a rich and creamy center.
-
Glaze – A light glaze, usually made from icing sugar and water or milk, is often applied to the pastry after baking. This gives the Danish pastry a glossy, sweet finish.
Equipment Needed
To make Mary Berry’s Danish Pastry, having the right tools is essential for both ease and precision. Here’s a list of the equipment you’ll need:
-
Mixing Bowl – A large bowl for combining all your ingredients together. This will be your main workspace for mixing the dough.
-
Dough Hook or Electric Mixer – While you can mix by hand, using a stand mixer with a dough hook attachment will save time and ensure the dough comes together smoothly.
-
Rolling Pin – A rolling pin is needed to roll out the dough and laminate it. A French rolling pin (without handles) or a traditional rolling pin works well for this process.
-
Baking Tray – You’ll need a large, flat baking tray to place your formed pastries. It’s best to line it with parchment paper to prevent sticking.
-
Pastry Brush – A pastry brush is ideal for applying egg wash or glaze to your pastries for a golden, shiny finish.
-
Plastic Wrap or Tea Towel – These will be necessary to cover your dough while it’s resting and rising. A clean tea towel can also be used to cover the pastries during proofing.
-
Sharp Knife or Pastry Cutter – You’ll need a sharp knife to cut the dough into shapes if making individual pastries, or to trim any excess dough.
-
Oven – An oven preheated to the right temperature is key to getting your Danish pastry to bake evenly and turn out perfectly crisp and golden.
-
Cooling Rack – Once baked, let your Danish pastries cool slightly on a wire rack so that air can circulate, preventing sogginess.
How To Make Mary Berry’s Danish Pastry
Making Mary Berry’s Danish Pastry requires some patience, as it involves several steps that result in those delightful flaky layers. Here’s a step-by-step guide:
-
Prepare The Dough
- Start by combining your plain flour, sugar, salt, and yeast in a large mixing bowl. Make sure to add the yeast and salt on opposite sides of the bowl to prevent them from coming into direct contact, as this can inhibit yeast activation.
- Add the milk, water, and egg to the dry ingredients and mix until a dough forms. You can use a stand mixer with a dough hook to make this process easier. Once the dough is smooth, knead it on a lightly floured surface for about 5 minutes.
-
Chill The Dough
- Once the dough is kneaded, wrap it in plastic wrap or cover it with a tea towel and let it chill in the fridge for at least 30 minutes. Chilling helps to relax the dough and makes it easier to roll out.
-
Prepare The Butter Block
- While the dough chills, take your cold butter and flatten it into a square using a rolling pin. Place it between two sheets of parchment paper and roll it out until it forms a square that is about 1/4 inch thick. Keep it chilled until you’re ready to incorporate it into the dough.
-
Laminate The Dough
- Roll the chilled dough out into a rectangle on a lightly floured surface. Place the cold butter square in the center of the dough and fold the dough over the butter to encase it completely. This is known as “enclosing the butter”.
- Roll the dough into a long rectangle again, then fold it into thirds, like a letter. This process is called a “single turn”. Wrap the dough in plastic and chill it for 20-30 minutes. Repeat this rolling and folding process two more times, ensuring the dough is chilled in between each turn.
-
Shape The Pastries
- After completing the lamination process, roll the dough out to your desired thickness, typically about 1/4 inch thick. Cut the dough into squares, rectangles, or other shapes as per your preference.
- Add your choice of filling (fruit preserves, marzipan, or custard) in the center of each pastry. You can fold the corners toward the center or leave them open for a more rustic look.
-
Proof The Pastries
- Place the shaped pastries on a baking tray lined with parchment paper. Cover them with a clean tea towel or plastic wrap and leave them to rise for about 30 minutes, or until they have puffed up slightly.
-
Bake
- Preheat the oven to 400°F (200°C). Brush the pastries with a light egg wash (a beaten egg with a little water or milk) to give them a beautiful golden color.
- Bake the pastries for about 15-20 minutes, or until they are golden brown and puffed up.
-
Glaze
- Once baked, let the pastries cool on a wire rack. If desired, glaze them with a simple icing made from powdered sugar and water to give them a glossy finish.
Expert Tips
-
Chill the Dough and Butter Well – Keeping both the dough and butter cold throughout the lamination process is essential for creating those beautiful flaky layers. If at any point the dough becomes too soft or sticky, return it to the fridge to chill.
-
Use Quality Butter – Since butter is such a central component of the flavor, using high-quality, unsalted butter will make a noticeable difference in taste.
-
Don’t Overfill – When adding fillings, be careful not to overfill the pastries. Too much filling can cause the dough to become soggy or make the pastry difficult to seal properly.
-
Ensure Proper Proofing – The dough needs time to rise and develop its airy texture, so don’t rush the proofing stage. Make sure the pastries have risen sufficiently before baking.
-
Work Quickly but Carefully – The lamination process can be delicate, so try to work quickly but carefully. Overworking the dough or butter can result in tough pastries.
Mary Berry’s Danish Pastry recipe is a delight to make, though it requires patience and attention to detail. The reward is a batch of beautiful, flaky pastries that are perfect for breakfast or dessert.
From the buttery layers to the sweet fillings, every bite offers a little piece of pastry perfection. While the process may take some time, the effort is well worth it when you take your first bite of these golden, melt-in-your-mouth treats.
With a little practice, you’ll master the art of Danish pastry and be able to impress friends and family with your skills in the kitchen. Happy baking!.
Easy Recipe Variations For Mary Berry’s Danish Pastry
Mary Berry’s Danish pastry is a beloved treat, known for its buttery, flaky layers and indulgent fillings. But while her original recipe is delicious on its own, there are plenty of easy variations that can add a unique twist to this classic pastry. Here are some fun and simple ways to switch up your Danish pastry to suit different tastes and occasions:
-
Fruit Fillings
While the traditional Danish often includes a sweetened cream cheese filling, one of the easiest variations is to swap out the filling with fresh fruit or fruit preserves. Try a classic apple filling with a hint of cinnamon, or use berries like raspberries, strawberries, or blueberries for a burst of summer flavor. You can even combine different fruits-think of a peach and raspberry combo for a tangy-sweet contrast.
-
Nutty Delights
Add a bit of crunch and richness to your Danish pastry by incorporating ground nuts such as almonds, hazelnuts, or pistachios. You could create a pistachio cream filling or simply sprinkle crushed nuts over the pastry before baking for an extra texture contrast. Almonds work particularly well with fruit fillings, such as cherry or apricot.
-
Chocolate Lovers’ Danish
For a more decadent treat, incorporate chocolate into your Danish pastry. You can use high-quality dark or milk chocolate, either in a drizzle over the top after baking or as a filling in the center. A mix of chocolate and raspberry or orange can create a beautifully balanced flavor, combining rich cocoa with fruity tartness.
-
Lemon Zest and Cream Cheese
Lemon and Danish pastry go together like a match made in heaven. Adding lemon zest or lemon curd to your cream cheese filling brings a bright, tangy contrast to the sweetness of the pastry. You can also try incorporating lemon juice into the glaze for an extra zesty finish.
-
Spices and Herbs
If you want to give your Danish pastry a more aromatic twist, experimenting with spices can be a great way to elevate the flavor. Nutmeg, cinnamon, or cardamom can lend warmth and depth to the pastry.
For an unexpected herbal note, consider adding finely chopped fresh herbs like rosemary or thyme to the dough or filling. They pair especially well with fruit-based or nut-based pastries.
-
Savory Danish Pastry
While Mary Berry’s Danish pastry is traditionally sweet, savory versions can also be delicious. Instead of a sweet cream cheese filling, try a savory cheese filling such as cheddar, goat cheese, or ricotta, and pair it with cooked spinach, caramelized onions, or smoked salmon. These savory pastries can be served as an appetizer or part of a brunch spread.
These variations are all relatively simple to make and can be customized to fit your tastes and the occasion. Whether you’re baking for a special event or just treating yourself, these creative takes on Mary Berry’s classic Danish pastry will surely impress!
Best Practices To Store Leftovers
Danish pastry, as delightful as it is fresh from the oven, is also prone to becoming soggy or stale if not stored properly. If you happen to have leftovers or want to prep ahead for a future gathering, knowing the best practices for storing Danish pastries will ensure they maintain their flaky texture and delicious flavor for as long as possible.
-
Cool Completely Before Storing
The first thing to remember is that Danish pastries should be completely cooled before storing them. If you store them while still warm, the moisture from the pastry will condense inside the storage container, making the pastry soggy. Place the pastries on a wire rack to cool thoroughly at room temperature.
-
Use an Airtight Container
To keep your Danish pastries fresh, store them in an airtight container. This will prevent them from drying out and protect them from absorbing any unwanted moisture or odors in the environment.
Avoid using plastic bags, as they can cause the pastry to lose its crispy texture. A container with a tight-fitting lid works best.
-
Avoid Refrigeration
While refrigeration may seem like a good option for keeping pastries fresh, it can actually cause the pastry to become stale more quickly. The cold temperatures can also negatively affect the flaky layers, making them less appealing.
Instead, store the pastries at room temperature for up to 2 days. If you live in a very humid or hot environment, you may want to place them in the fridge briefly to help maintain their freshness, but only for a short period.
-
Freezing for Longer Storage
If you need to store Danish pastries for longer than a couple of days, freezing them is the best option. Wrap each pastry tightly in plastic wrap or foil, and then place them in a resealable freezer bag.
For best results, consume frozen Danish pastries within 1-2 months. When ready to eat, you can thaw them at room temperature or pop them in the oven for a few minutes to crisp them back up.
-
Reheating Danish Pastry
When reheating leftovers, aim to bring back the crispiness that makes Danish pastries so irresistible. Instead of microwaving, which can make the pastry soggy, reheat them in the oven at 350°F (175°C) for about 5-7 minutes.
You can also place them in a toaster oven for a quicker, smaller-scale option. If you’re reheating frozen pastries, bake them from frozen and allow a few extra minutes to warm through.
By following these storage and reheating tips, you can enjoy your Danish pastries even after they’ve cooled down, without sacrificing texture or flavor!
What Goes Well With Danish Pastry
Danish pastries are versatile and can be enjoyed with a wide range of accompaniments, whether for a breakfast, brunch, or afternoon tea. These treats pair beautifully with various beverages, spreads, and sides. Here are some delightful ideas for pairing:
-
Coffee and Tea
Danish pastries are a classic companion to coffee, particularly a strong black coffee or a frothy cappuccino. The rich, buttery pastry complements the robust flavor of coffee perfectly. If you prefer tea, a fragrant Earl Grey or a smooth, delicate green tea can balance the sweetness of the pastry, while an herbal tea like chamomile or mint offers a soothing contrast.
-
Fresh Fruit
Pairing Danish pastry with fresh fruit is a wonderful way to add a burst of freshness to the indulgent treat. Think about serving it with sliced strawberries, raspberries, or orange segments for a citrusy note. A fruit salad with a mix of berries, kiwi, and melon can bring a refreshing balance to the richness of the pastry.
-
Jam and Cream
For a traditional and simple pairing, serve your Danish pastry with a dollop of clotted cream or whipped cream and a spoonful of your favorite fruit jam. Raspberry, apricot, or strawberry jam are especially popular choices, but you can experiment with any fruit preserve that complements the flavors of your pastry.
-
Cheese
For a more savory accompaniment, pairing Danish pastry with cheese can be a delightful contrast of flavors. Soft cheeses like mascarpone or cream cheese work wonderfully when paired with fruit-filled pastries. If you’re going for a savory Danish pastry, a sharp cheddar or a brie will complement the buttery layers of the pastry perfectly.
-
Sparkling Wine or Champagne
For a celebratory twist, pair Danish pastries with a glass of bubbly. A sparkling wine or Champagne, with its light effervescence and acidity, can cut through the richness of the pastry, providing a refreshing contrast. This pairing works especially well when serving pastries as part of a brunch or special occasion.
Conclusion
Mary Berry’s Danish pastry is a timeless treat that has delighted pastry lovers for generations. Its versatility in flavor, texture, and presentation makes it a go-to choice for any occasion, from casual breakfast bites to elegant dessert displays. By experimenting with variations like fruity fillings, chocolate accents, or savory twists, you can customize this classic to suit any taste or event.
Additionally, following best practices for storing and reheating leftovers will help you extend the life of your pastries without compromising on flavor and texture. When paired with the right beverages, fruits, or spreads, Danish pastries become even more indulgent, making them the perfect addition to any gathering or personal treat. Whether you’re enjoying a quiet moment with coffee or celebrating with friends and family, Mary Berry’s Danish pastry is a delightful choice that never fails to impress.
FAQs
What Ingredients Do I Need For Mary Berry’s Danish Pastry?
To make Mary Berry’s Danish pastry, you’ll need butter, strong plain flour, caster sugar, yeast, milk, water, egg, and salt. You’ll also need extra butter for laminating the dough and a filling of your choice, such as raspberry jam, cream cheese, or chocolate.
How Long Does It Take To Make Mary Berry’s Danish Pastry?
Making Mary Berry’s Danish pastry takes around 2 hours, but you should also factor in the chilling and resting time. The dough needs to rest in the fridge for at least 30 minutes before rolling it out. You’ll also need time for it to rise before baking.
Can I Use Ready-made Puff Pastry Instead Of Making My Own?
While Mary Berry’s recipe uses homemade laminated dough for the best flaky texture, you can use ready-made puff pastry as a shortcut. However, the result may not have the same lightness and flavor as the homemade version.
Do I Need To Use Fresh Yeast For Mary Berry’s Danish Pastry Recipe?
You can use either fresh or dried yeast for this recipe. If using dried yeast, make sure to activate it in warm water before mixing it into the dough, as Mary Berry’s recipe relies on the yeast to create a light, airy texture.
What Is The Best Way To Laminate The Dough For Danish Pastries?
Laminating the dough involves folding and rolling it multiple times to create layers. In Mary Berry’s recipe, the butter is rolled into the dough in a specific way to form thin layers that will puff up during baking. This process requires careful folding and chilling in between to prevent the butter from melting into the dough.
Can I Make Mary Berry’s Danish Pastry Ahead Of Time?
Yes, you can prepare the dough ahead of time. Once you’ve made the dough, allow it to chill in the fridge overnight. When you’re ready to bake, shape the pastries, let them rise, and then bake as directed.
What Is The Best Temperature To Bake Danish Pastries?
Mary Berry recommends baking Danish pastries in a preheated oven at 200°C (400°F) for about 15-20 minutes, or until they are golden brown and puffed up. Keep an eye on them to ensure they don’t over-bake.
How Do I Shape The Danish Pastries?
Shaping the Danish pastries can vary depending on the type of filling. For a classic shape, roll out the dough, cut it into squares, and fold the edges to create a center pocket. You can also shape them into twists or pinwheels by rolling the dough around the filling.
Can I Freeze Mary Berry’s Danish Pastries?
Yes, you can freeze both the dough and the baked pastries. To freeze the dough, wrap it tightly in plastic wrap and freeze before it’s shaped. If freezing the baked pastries, allow them to cool completely before storing them in an airtight container in the freezer.
What Are Some Popular Fillings For Mary Berry’s Danish Pastries?
Popular fillings for Danish pastries include fruit jams like raspberry or apricot, cream cheese, almond paste, or even chocolate. You can also get creative with seasonal fruits or custard for a rich and delicious filling.
![Mary Berry Rock Cakes Recipe [Tips & Tricks]](https://famousyummyrecipes.com/wp-content/uploads/2025/03/rock-cakes.jpg)
![Mary Berry Garlic Mushrooms And Cured Ham On Toasted Brioche Recipe [Tips & Tricks]](https://famousyummyrecipes.com/wp-content/uploads/2025/03/garlic-mushrooms-and-cured-ham-on-toasted-brioche.jpg)
![Mary Berry Thomas Flan Recipe [Tips & Tricks]](https://famousyummyrecipes.com/wp-content/uploads/2025/03/thomas-flan.jpg)
![Mary Berry Pumpkin Soup Recipe [Tips & Tricks]](https://famousyummyrecipes.com/wp-content/uploads/2025/03/pumpkin-soup.jpg)
![Mary Berry Ginger Loaf Recipe [Tips & Tricks]](https://famousyummyrecipes.com/wp-content/uploads/2025/03/ginger-loaf.jpg)
![Mary Berry Sticky Chicken Recipe [Tips & Tricks]](https://famousyummyrecipes.com/wp-content/uploads/2025/03/sticky-chicken.jpg)