
Mary Berry Milk Chocolate Cake Recipe [Tips & Tricks]
Note: This page contains affiliate links.
As an Amazon Associate, I earn from qualifying purchases when you click on the link, but you are not charged extra.
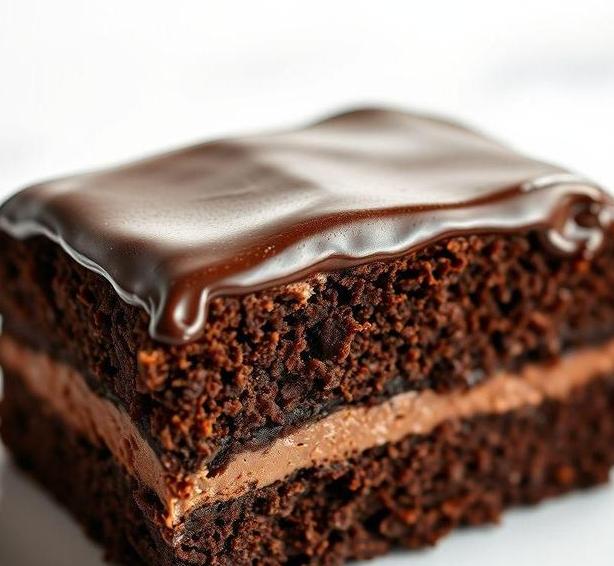
If you’re looking to indulge in a rich, indulgent treat that’s sure to impress, you absolutely need to try Mary Berry’s milk chocolate cake recipe. This recipe is the perfect blend of moist cake and creamy milk chocolate flavor, all tied together with Mary Berry’s expert touch, making it a foolproof dessert choice.
Whether you’re baking for a special occasion or just craving something sweet, this cake is sure to satisfy with its heavenly texture and melt-in-your-mouth chocolate goodness. Plus, it’s surprisingly easy to make, so you don’t have to be a pro baker to enjoy this sweet masterpiece!.
Mary Berry Milk Chocolate Cake Recipe
Ingredients Needed
To recreate Mary Berry’s famous Milk Chocolate Cake, you’ll need a combination of simple yet rich ingredients that bring this indulgent cake to life. Here’s a detailed breakdown:
-
Self-raising flour (225g): This flour is essential for achieving a light, airy texture in your cake. It already contains a leavening agent, which helps the cake rise perfectly without needing additional baking powder.
-
Cocoa powder (50g): This is the secret to the cake’s rich, chocolatey flavor. The cocoa powder ensures a deep, satisfying taste of chocolate without overwhelming the cake’s sweetness.
-
Caster sugar (225g): For that perfect balance of sweetness. Caster sugar dissolves easily and helps create a light and fluffy batter while ensuring the cake is delightfully sweet.
-
Unsalted butter (225g): Butter adds moisture and richness to the cake. Opting for unsalted butter ensures you have full control over the cake’s saltiness, which balances the sweetness perfectly.
-
Large eggs (3): Eggs act as the binding agents in this cake, helping to hold everything together while also contributing to its soft, moist texture.
-
Whole milk (150ml): Milk not only helps to thin out the batter to the right consistency but also enhances the cake’s overall richness, making it moist and delicious.
-
Milk chocolate (200g): A key ingredient for the frosting. Using good-quality milk chocolate will make the cake truly decadent. The milk chocolate’s creaminess is the perfect partner to the lightness of the sponge.
-
Golden syrup (2 tablespoons): This is added to the frosting to give it a smooth consistency and a slight caramel flavor that complements the chocolate.
-
Icing sugar (250g): This is combined with the milk chocolate and golden syrup to create a silky smooth, glossy frosting that makes the cake look as amazing as it tastes.
Equipment Needed
To prepare Mary Berry’s Milk Chocolate Cake, having the right equipment is key to ensuring smooth and efficient baking. Here’s a list of the essential tools you’ll need:
-
Mixing bowls (2-3): A couple of medium-sized mixing bowls will be necessary to combine the wet and dry ingredients. You’ll need one for the cake batter and one for the frosting. A third bowl might come in handy for melting the chocolate.
-
Electric mixer or hand whisk: While you can whisk by hand, an electric mixer makes the job quicker and easier, helping you achieve the light and airy texture needed for the cake.
-
Measuring cups and spoons: Precision is key in baking, so make sure you have measuring cups and spoons to get the quantities of ingredients just right.
-
Cake tins (2 x 20cm round): Mary Berry suggests using two 20cm round cake tins. They should be greased and lined with parchment paper to ensure that the cakes come out of the tins easily after baking.
-
Palette knife or spatula: For smoothing the frosting on top of the cake, a palette knife or spatula works wonders. It gives you control over the frosting’s application, making it look neat and professional.
-
Cooling rack: Once your cakes are out of the oven, you’ll want to cool them on a rack. This prevents moisture from accumulating at the bottom of the cakes and helps them retain their light texture.
-
Saucepan: For melting the milk chocolate and combining it with the golden syrup and icing sugar to make the frosting.
-
Sieve: You might need a sieve for sifting the flour and cocoa powder, ensuring there are no lumps in your dry ingredients and that they mix evenly with the wet ingredients.
How To Make Mary Berry’s Milk Chocolate Cake
Creating Mary Berry’s Milk Chocolate Cake is a rewarding experience, blending simple steps with the rich, comforting aroma of baking. Follow this process for a cake that’s as delicious as it is indulgent:
-
Preheat the Oven & Prepare the Tins: Start by preheating your oven to 180°C (160°C fan-assisted) or 350°F. Grease and line your two 20cm round cake tins with parchment paper. This step ensures the cakes come out cleanly once baked.
-
Mix the Dry Ingredients: In a large mixing bowl, sift together the self-raising flour and cocoa powder. This prevents any lumps and ensures an even texture. Add the caster sugar and mix everything together.
-
Add the Wet Ingredients: In another bowl, whisk together the eggs, milk, and melted butter (make sure the butter isn’t too hot). Pour this wet mixture into the dry ingredients and beat with an electric mixer until everything is combined and smooth. You’re looking for a thick but pourable batter.
-
Bake the Cakes: Divide the batter equally between the prepared cake tins and level it out with a spatula. Place the tins on the middle rack of your oven and bake for 20-25 minutes. To check if they’re done, insert a skewer into the center of the cakes-if it comes out clean, they’re ready.
-
Cool the Cakes: Allow the cakes to cool in their tins for 10 minutes before transferring them to a wire rack to cool completely.
-
Prepare the Frosting: While the cakes cool, chop the milk chocolate into small pieces and place it in a saucepan. Gently melt the chocolate over low heat, stirring frequently. Once melted, add the golden syrup and stir until smooth. Then, sift in the icing sugar and mix until the frosting is glossy and creamy.
-
Assemble the Cake: Once the cakes have completely cooled, spread a generous layer of frosting on top of the first cake. Place the second cake on top and cover the entire cake with the remaining frosting. Smooth it out evenly with a palette knife.
-
Finishing Touches: If desired, you can add chocolate shavings or decorations on top of the frosting to make it even more visually appealing.
Expert Tips
-
Room Temperature Ingredients: Make sure your butter, eggs, and milk are at room temperature before mixing. This ensures that they blend more easily and help create a smooth batter without lumps.
-
Don’t Overmix the Batter: When mixing your batter, avoid overmixing. Overworking the cake batter can lead to a dense and heavy cake. Mix just enough until the ingredients are combined.
-
Room Temperature Cake: Let your cakes cool completely before frosting them. If the cake is even slightly warm, the frosting could melt, resulting in a messy, runny finish.
-
Temperature Control for Melting Chocolate: When melting your milk chocolate, do so over a gentle heat. If the chocolate is too hot when added to the frosting ingredients, it may cause the frosting to seize up or become grainy.
-
Perfect Cake Texture: If you find that your cake batter is too thick, add a little more milk, a tablespoon at a time, until you get the desired consistency. The batter should be thick but spoonable.
-
Storage: This cake keeps beautifully for several days in an airtight container. If you have leftovers (unlikely, but possible!), store them in the fridge, but let the cake come to room temperature before serving for the best texture.
Mary Berry’s Milk Chocolate Cake is a classic, beloved recipe that promises both simplicity and indulgence. Whether you’re a beginner or an experienced baker, this cake is a foolproof way to impress your friends, family, or yourself with a delicious homemade treat.
With a few quality ingredients and the right techniques, you can create a cake that’s rich, moist, and decadently chocolatey, all topped off with a velvety milk chocolate frosting. Don’t forget the expert tips-these small adjustments can elevate your baking game and ensure your cake turns out perfect every time.
So, gather your ingredients, grab your mixing bowls, and get ready to create a cake that will delight your taste buds and fill your home with irresistible chocolatey aromas. Happy baking!
Easy Recipe Variations For Mary Berry’s Milk Chocolate Cake
Mary Berry’s Milk Chocolate Cake is already a delectable treat, but sometimes you may want to switch things up a bit and experiment with flavors, textures, or presentation. Fortunately, this cake is versatile and lends itself well to various creative twists. Here are some easy recipe variations to consider:
1. Adding Fruit for Freshness and Texture
One of the simplest variations you can make is incorporating fruits into the cake. For example, adding mashed bananas to the batter can bring moisture and a subtle sweetness.
Alternatively, you can mix in fresh berries such as raspberries, strawberries, or blueberries into the batter or use them as a topping after baking. The tartness of the berries contrasts beautifully with the sweetness of the chocolate, creating a balanced flavor profile. For a more tropical twist, pineapple or mango chunks work wonderfully as well.
2. Adding Nuts for a Crunch
For a richer texture, try adding chopped nuts to the cake batter. Walnuts, almonds, or hazelnuts complement chocolate perfectly, adding a delightful crunch.
You could also toast the nuts beforehand to intensify their flavor, giving the cake a nutty depth. These additions work especially well if you’re planning to decorate the cake with a handful of nuts on top.
3. Swapping Milk Chocolate for Dark or White Chocolate
While Mary Berry’s Milk Chocolate Cake is divine with milk chocolate, it can also shine with a different chocolate variety. If you enjoy a more intense chocolate flavor, consider swapping the milk chocolate for dark chocolate.
This variation will bring a richer, slightly bitter profile to the cake, perfect for chocolate lovers who enjoy a deeper taste. Alternatively, for those who prefer a sweeter, creamier flavor, white chocolate is an excellent option. White chocolate adds a smooth, milky sweetness that contrasts beautifully with the cake’s other flavors.
4. Adding Coffee or Liqueur for Depth
For an adult version of this cake, adding a splash of coffee or a liqueur such as Baileys, Kahlua, or Grand Marnier can elevate the flavor profile. The addition of coffee intensifies the chocolate flavor, while the liqueur adds a sophisticated twist. Simply mix a tablespoon or two of brewed coffee or liqueur into the batter, and you’ll notice a beautifully rich undertone in every bite.
5. Making It a Layer Cake
Mary Berry’s Milk Chocolate Cake can be transformed into a stunning layered cake. Bake two or three cakes, then stack them with layers of whipped cream, buttercream, or chocolate ganache between them. This transforms your simple cake into a grand celebration centerpiece that’s perfect for birthdays, weddings, or any special occasion.
6. Vegan and Gluten-Free Options
For those with dietary restrictions, it’s easy to modify the recipe to cater to vegan or gluten-free diets. To make a vegan version, substitute the eggs with flax eggs (1 tablespoon of ground flaxseed mixed with 3 tablespoons of water), and use a dairy-free milk alternative like almond or oat milk.
For a gluten-free version, swap the regular flour for a gluten-free flour blend. Be sure to check the rest of the ingredients for hidden animal products or gluten.
Best Practices To Store Leftovers
Mary Berry’s Milk Chocolate Cake is so delicious that you might find yourself with a few leftovers. Properly storing the cake is essential to keeping it fresh, moist, and delicious for as long as possible. Here are some best practices:
1. Room Temperature Storage
If you plan to consume the leftovers within a few days, storing the cake at room temperature is usually the best option. First, make sure the cake has cooled completely.
If the cake has a frosting or icing on it, you’ll want to cover it loosely with a piece of plastic wrap or store it in an airtight container to prevent it from drying out. Keep it in a cool, dry place away from direct sunlight and heat sources. Typically, cakes stored this way will stay fresh for about 3 to 4 days.
2. Refrigeration for Extended Freshness
If you know the cake will take longer to be eaten or want to preserve it for a bit more time, refrigeration is a better option. When refrigerating, it’s important to first cover the cake with plastic wrap or place it inside an airtight container to prevent the cake from absorbing any odors from other foods in the fridge.
The refrigeration process may cause the cake to dry out slightly, so it’s always a good idea to bring it to room temperature before serving to restore its moistness. Stored properly, your cake will remain fresh for up to a week.
3. Freezing for Long-Term Storage
For those looking to store the cake for even longer, freezing is a great option. To freeze your Mary Berry Milk Chocolate Cake, first ensure the cake is completely cooled.
Wrap the cake in several layers of plastic wrap to protect it from freezer burn, then place it in an airtight container or a heavy-duty freezer bag. If you’ve baked a layered cake, it’s best to freeze individual layers to make thawing easier.
Cakes can be frozen for up to 3 months. When you’re ready to eat it, simply thaw the cake in the fridge overnight, and let it sit at room temperature for about 30 minutes before serving. The cake should be as moist and delicious as the day you made it.
4. Portioning Before Freezing
To avoid thawing and reheating the entire cake, slice the cake into individual portions before freezing. This allows you to thaw only the amount you need at a time, and the slices will freeze more quickly. After wrapping the slices, you can easily defrost a single piece without affecting the rest of the cake.
What Goes Well With Milk Chocolate Cake
While Mary Berry’s Milk Chocolate Cake is rich and flavorful on its own, there are many pairings that can elevate the experience. Here are some great options:
1. Whipped Cream or Ice Cream
A dollop of freshly whipped cream or a scoop of vanilla ice cream is a classic pairing with chocolate cake. The lightness and creaminess of both complement the dense, rich texture of the cake.
You can also get creative and try different ice cream flavors like chocolate, caramel, or raspberry for an added twist. For a festive touch, a drizzle of chocolate sauce or fruit compote can add an extra layer of indulgence.
2. Fresh Berries
Fresh fruit adds a refreshing contrast to the richness of the cake. Berries, such as strawberries, raspberries, or blackberries, not only look beautiful when served alongside the cake, but their natural tartness provides a lovely balance to the sweetness of the chocolate. You can also sprinkle the berries over the cake or serve them as a side for a visually appealing presentation.
3. A Hot Beverage
To enhance the experience of eating Mary Berry’s Milk Chocolate Cake, pair it with a warm beverage. Coffee is an excellent option because its slightly bitter flavor complements the sweetness of the chocolate.
Alternatively, you could serve the cake with a hot cup of tea, such as Earl Grey or chai, which brings its own distinct flavors and aromas that pair beautifully with chocolate. If you’re in the mood for something decadent, try pairing the cake with a hot chocolate or a rich mocha.
4. Caramel or Nut Butters
Caramel and chocolate are a match made in heaven, so consider pairing your cake with a drizzle of caramel sauce or a spoonful of nut butter, such as peanut butter or hazelnut spread. These options add both richness and complexity to the dessert, making each bite even more indulgent.
5. Sparkling Wine or Dessert Wine
For a more sophisticated pairing, consider serving your chocolate cake with a glass of sparkling wine or dessert wine. Champagne, Prosecco, or a sweet dessert wine like Port or Madeira can bring out the deep flavors of the chocolate. The bubbles in sparkling wine can also provide a refreshing contrast to the richness of the cake.
Conclusion
Mary Berry’s Milk Chocolate Cake is a timeless and versatile dessert that can be enjoyed in countless ways. Whether you prefer to keep it classic or explore fun variations like adding fruit, nuts, or even swapping out the type of chocolate, this cake offers endless possibilities.
Properly storing leftovers ensures that you can enjoy it for days to come, while the right pairings-such as fresh berries, whipped cream, or a warm beverage-can elevate your experience even further. No matter how you serve or store it, this cake remains a crowd-pleasing treat that’s sure to satisfy any chocolate lover’s cravings.
FAQs
What Ingredients Are Needed For Mary Berry’s Milk Chocolate Cake?
For Mary Berry’s milk chocolate cake, you will need flour, cocoa powder, baking powder, butter, sugar, eggs, milk, and milk chocolate. The milk chocolate is typically used in both the cake batter and for the frosting, providing a rich, creamy flavor.
Can I Use Dark Chocolate Instead Of Milk Chocolate For The Cake?
Yes, you can substitute dark chocolate for milk chocolate, but this will alter the flavor of the cake. Dark chocolate is less sweet than milk chocolate, so it will give the cake a more intense, less sugary taste.
How Do I Make The Frosting For Mary Berry’s Milk Chocolate Cake?
To make the frosting, melt milk chocolate and mix it with butter, icing sugar, and a little milk. Whisk until smooth, then spread over the cooled cake. This will give the cake a glossy, smooth chocolate topping.
Can I Make Mary Berry’s Milk Chocolate Cake Ahead Of Time?
Yes, you can prepare the cake ahead of time. The cake itself can be baked and stored in an airtight container for up to 3 days.
The frosting can also be made a day in advance and stored in the fridge. Just allow it to come to room temperature before applying it to the cake.
How Long Does It Take To Bake Mary Berry’s Milk Chocolate Cake?
Mary Berry’s milk chocolate cake typically takes about 20-25 minutes to bake at 180°C (350°F). It’s important to check the cake with a skewer to ensure it is fully cooked. The skewer should come out clean when inserted into the center of the cake.
Can I Use A Different Type Of Milk For Mary Berry’s Milk Chocolate Cake?
Yes, you can substitute whole milk with other types of milk such as semi-skimmed milk, almond milk, or oat milk. However, the texture and flavor of the cake might vary slightly depending on the milk substitute used.
What Can I Use As A Substitute For Butter In Mary Berry’s Milk Chocolate Cake?
You can substitute butter with margarine or a plant-based alternative like coconut oil if you’re looking for a dairy-free option. Keep in mind that the flavor and texture might change slightly, but the cake should still turn out delicious.
How Do I Store Mary Berry’s Milk Chocolate Cake?
Mary Berry’s milk chocolate cake should be stored in an airtight container at room temperature. It will stay fresh for up to 3 days. If you need to store it for a longer period, you can freeze the cake for up to 3 months, but ensure it’s wrapped properly to avoid freezer burn.
Can I Decorate Mary Berry’s Milk Chocolate Cake With Other Toppings?
Yes, you can decorate the cake with various toppings such as whipped cream, chocolate shavings, sprinkles, or even fresh fruit. This will add extra flavor and texture to the cake, making it visually appealing as well.
Why Does My Mary Berry Milk Chocolate Cake Sink In The Middle?
A cake may sink in the middle if it is undercooked, overmixed, or if the oven temperature was too low. Ensure you follow the recipe’s timings and check the cake with a skewer. Make sure your oven is preheated to the right temperature, and avoid opening the oven door during the first 15-20 minutes of baking.
![Mary Berry Fish Pie Recipe [Tips & Tricks]](https://famousyummyrecipes.com/wp-content/uploads/2025/03/fish-pie.jpg)
![Mary Berry Tiny Chocolate Cupcakes Recipe [Tips & Tricks]](https://famousyummyrecipes.com/wp-content/uploads/2025/03/tiny-chocolate-cupcakes.jpg)
![Mary Berry Feathered White Chocolate Cheesecake Recipe [Tips & Tricks]](https://famousyummyrecipes.com/wp-content/uploads/2025/03/feathered-white-chocolate-cheesecake.jpg)
![Mary Berry Roasted Pepper And Ricotta Rolls Recipe [Tips & Tricks]](https://famousyummyrecipes.com/wp-content/uploads/2025/03/roasted-pepper-and-ricotta-rolls.jpg)
![Mary Berry Chicken Spinach And Tomato Lasagne Recipe [Tips & Tricks]](https://famousyummyrecipes.com/wp-content/uploads/2025/03/chicken-spinach-and-tomato-lasagne.jpg)
![Mary Berry Windfall Pie Recipe [Tips & Tricks]](https://famousyummyrecipes.com/wp-content/uploads/2025/03/windfall-pie.jpg)